How to Create Wood Textures Using Photoshop 2026
Are you a digital artist looking to take your designs to the next level? In this article, we’ll show you how to create realistic wood textures using Photoshop 2026. Wood textures add depth, warmth, and a natural element to your designs, making them more visually appealing and realistic. Whether you want to create a rustic website background, design product mockups, or add authenticity to a digital painting, learning how to create wood textures in Photoshop can significantly enhance your artwork.
In this step-by-step guide, we’ll cover the tools and techniques you need to create stunning wood textures. From choosing the right colors and adding realistic grain patterns to using modern Photoshop features such as Generative Fill, advanced brushes, and texture-enhancing filters, you’ll learn how to achieve professional-looking results with greater speed and flexibility.
Enhance your digital artistry and bring your designs to life with the beauty and warmth of wood textures. Follow our guide and unlock the full potential of Photoshop 2026 to create captivating and authentic designs that leave a lasting impression.
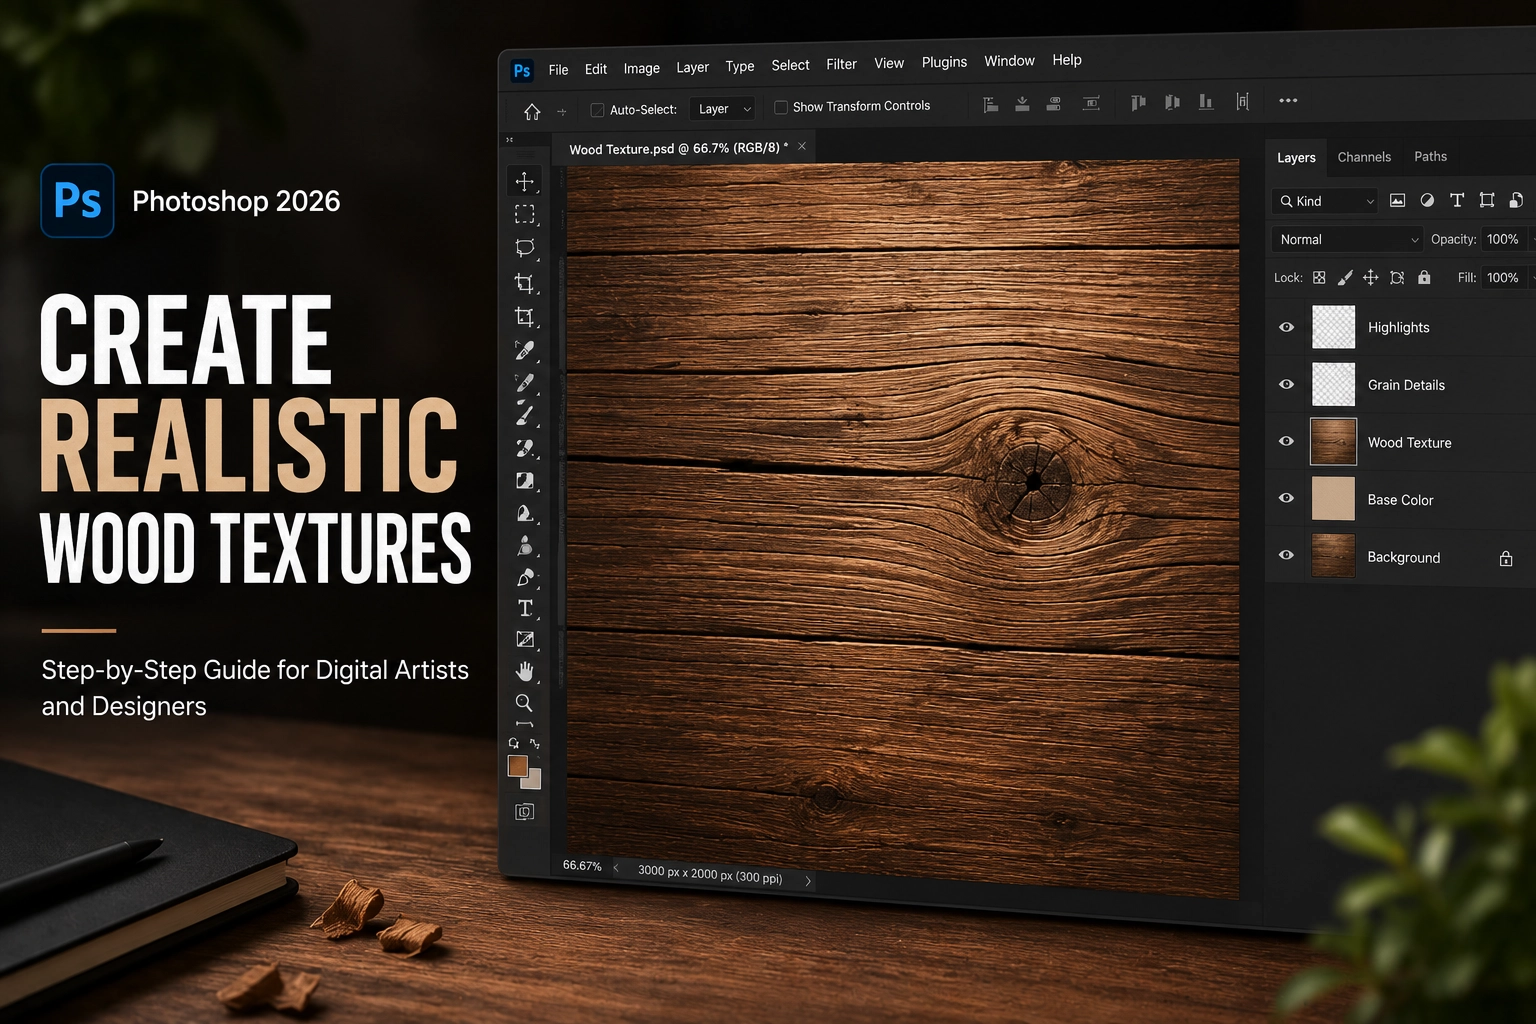
Understanding the Importance of Texture in Digital Art
Texture plays a crucial role in digital art by adding depth, realism, and visual interest to your designs. Whether you’re creating digital paintings, graphic designs, product mockups, game assets, or website backgrounds, incorporating textures can elevate your artwork and make it feel more authentic and immersive.
Wood textures, in particular, are highly versatile and can be used in a wide range of creative projects. They can create a sense of warmth, craftsmanship, nostalgia, or rustic charm, depending on the style you’re aiming for. From realistic backgrounds and packaging designs to 3D materials and digital illustrations, wood textures remain a popular choice among designers and artists.
By mastering the art of creating wood textures in Photoshop 2026, you’ll gain a valuable skill that can significantly enhance the quality and realism of your designs.
Overview of Photoshop and its Tools for Creating Wood Textures
Before diving into the process of creating wood textures, let’s familiarize ourselves with Photoshop and some of its essential tools. Photoshop 2026 offers a powerful set of features for creating realistic textures, combining traditional painting tools with modern AI-powered capabilities.
To create wood textures, you’ll primarily work with tools such as the Brush Tool, Gradient Tool, Layer Styles, and Blend Modes. The Brush Tool allows you to paint realistic wood grain patterns, while the Gradient Tool helps create smooth transitions between colors and tones. Layer Styles and Blend Modes make it easier to add depth, highlights, shadows, and realistic finishing effects.
In Photoshop 2026, you can also take advantage of features such as Generative Fill, Custom Brushes, and Neural Filters to enhance textures, generate variations, and speed up your workflow. These modern tools provide greater flexibility while still allowing complete creative control over the final result.
Understanding these tools will provide a solid foundation for creating stunning and realistic wood textures. Now, let’s move on to the step-by-step process of crafting wood textures in Photoshop.
Step-by-Step Guide to Creating Wood Textures in Photoshop
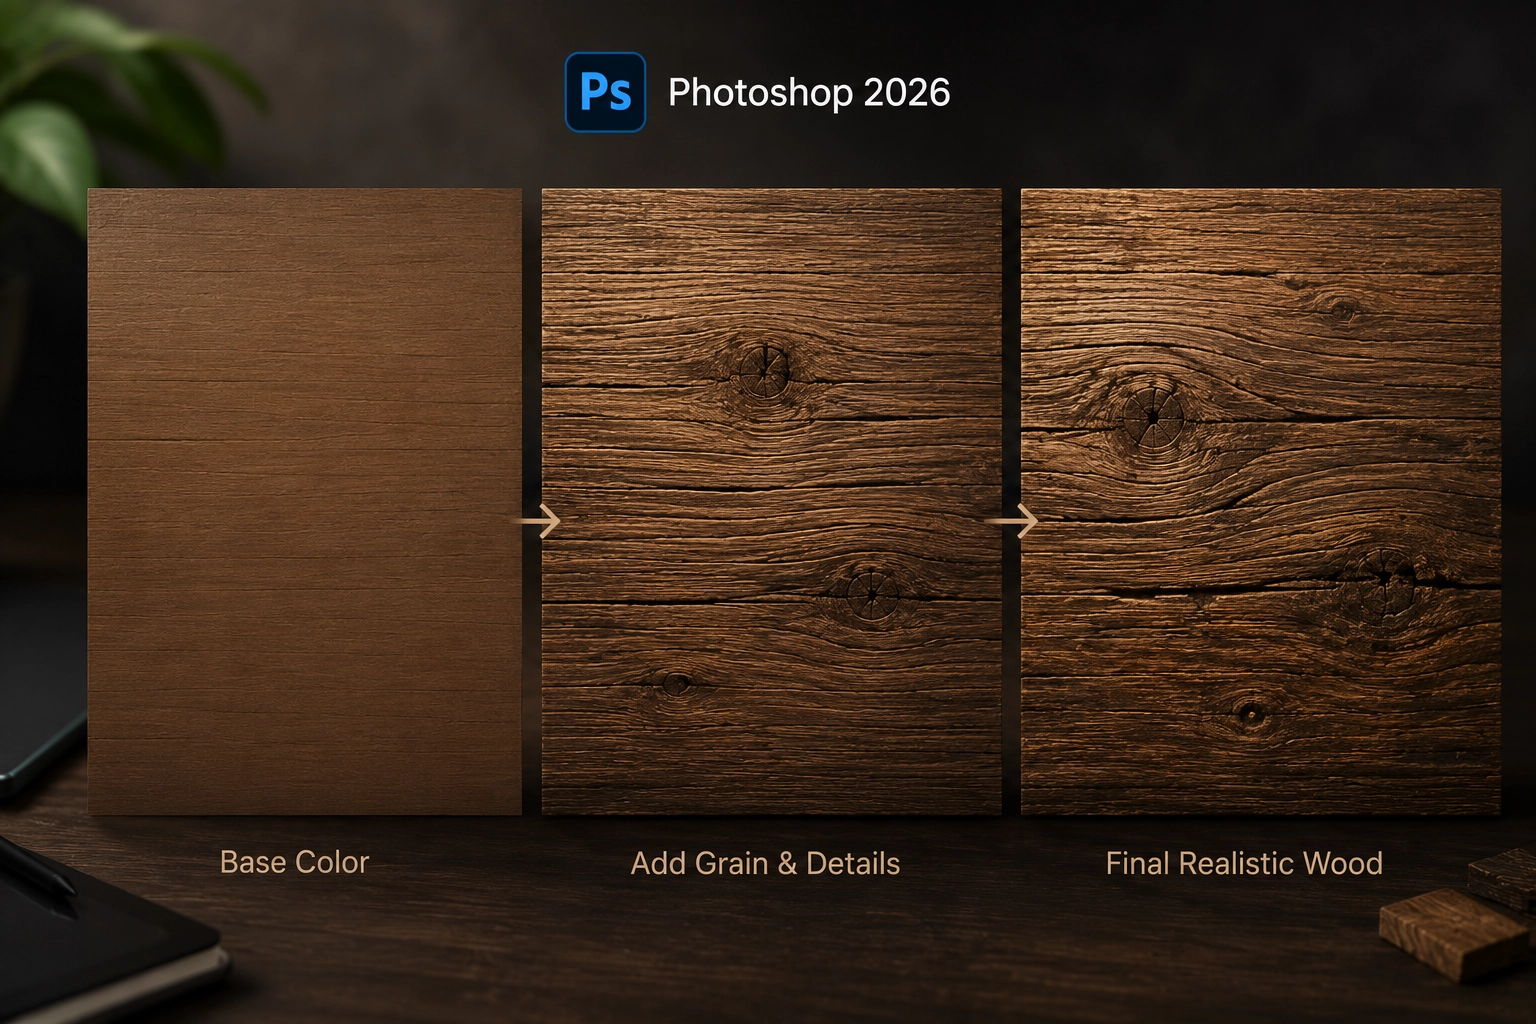
- Prepare Your Canvas – Start by creating a new document in Photoshop with the desired dimensions and resolution for your wood texture. Consider how the texture will be used, whether for digital art, website backgrounds, product mockups, or 3D materials, and choose an appropriate canvas size.
- Choose Your Base Color – Select a base color that represents the type of wood you want to recreate. For example, a light brown works well for oak, while darker shades are suitable for walnut or mahogany. Use the Paint Bucket Tool or a Gradient Fill to create a more natural color foundation.
- Add Wood Grain Patterns – Create a new layer and select the Brush Tool. Choose a textured brush or use one of Photoshop’s custom brushes to paint realistic wood grain patterns. Set the brush opacity to around 20-30% for a subtle effect and vary the brush size and pressure to create natural imperfections and variations.
- Enhance the wood grain – To add depth and realism, create a new layer and use the Burn Tool to darken certain areas of the grain. You can also use the Dodge Tool to introduce highlights and emphasize the natural curves and lines found in real wood textures.
- Introduce color variations – Real wood rarely has a single uniform color. Create a new layer and use the Brush Tool to paint slightly darker or lighter shades over selected areas of the texture. Use a low opacity and gradually build up the effect to achieve a natural appearance.
- Apply texture overlays – To further enhance realism, consider adding high-resolution wood texture overlays. Import a texture image into Photoshop and experiment with blending modes such as Overlay, Soft Light, or Multiply. Adjust the opacity until the texture blends naturally with your existing grain patterns.
- Add Fine Details and Imperfections – For an even more realistic look, add small cracks, knots, scratches, and subtle imperfections. These details help prevent the texture from looking too perfect and make it feel more authentic.
- Experiment with AI-Powered Features – In Photoshop 2026, tools like Generative Fill can help you create texture variations, extend wood patterns, or generate missing areas quickly. While traditional techniques still provide the most control, AI-powered features can significantly speed up your workflow and inspire new creative ideas.
- Organize and Save Your Texture – Once you’re satisfied with the result, organize your layers and save the texture in PSD format so you can make future edits. Export a high-resolution version in your preferred format for use in your projects.
Adding Depth and Realism to Wood Textures
Creating authentic wood textures involves more than just painting lines and adding colors. To make your wood textures truly lifelike, it’s essential to incorporate depth, natural imperfections, and subtle variations.
- Utilize Shading and Lighting Techniques – Shadows and highlights play a crucial role in conveying depth and dimension in wood textures. Use the Dodge and Burn Tools to selectively lighten or darken areas of your texture, emphasizing the contours and natural variations of the wood grain. Pay attention to the direction of light to ensure consistency throughout the texture.
- Add Knots and Imperfections – Real wood is rarely flawless, so adding knots, cracks, scratches, and other imperfections can make your texture more realistic. Create a new layer and use a small textured brush to paint these details onto your wood texture. Vary the size, shape, and placement of imperfections to avoid repetition.
- Consider the Wood’s Age and Condition – Different types of wood age and weather differently. Take into account the age and condition of the wood you’re trying to recreate. For example, aged wood often contains deeper cracks, faded colors, and weathered grain patterns, while freshly cut wood appears smoother and more vibrant.
- Add Subtle Surface Variations– Natural wood contains slight variations in color, roughness, and grain density. Use low-opacity brushes, gradients, or texture overlays to introduce subtle inconsistencies that make the texture feel more organic and realistic.
- Use Smart Objects for Flexibility – In Photoshop 2026, converting texture layers into Smart Objects allows you to make non-destructive adjustments and experiment with different effects without permanently altering the original texture.
Enhancing Wood Textures with Filters and Effects
Photoshop offers a wide range of filters and effects that can be applied to your wood textures to enhance their appearance and match your artistic vision.
- Apply a Noise Filter – Adding a subtle noise filter can introduce fine grain and natural imperfections to your wood texture. Go to Filter → Noise → Add Noise and adjust the settings until you achieve the desired effect. Experiment with the amount and distribution of noise to find the perfect balance.
- Experiment with Layer Blending Modes – Changing the blending mode of your texture layers can produce interesting and realistic effects. Try blending modes such as Multiply, Overlay, Soft Light, or Linear Light to add depth and richness to your wood textures. Adjust the opacity to control the intensity of the effect.
-
Use Camera Raw Filter for Fine-Tuning – In Photoshop 2026, the Camera Raw Filter is an excellent tool for refining wood textures. Adjust:
- Texture
- Clarity
- Contrast
- Highlights
- Shadows
These adjustments can significantly improve the realism and detail of your texture.
- Apply Smart Filters – Using Smart Filters allows you to experiment with effects non-destructively. You can revisit and modify filter settings at any time without damaging the original texture.
- Add Depth with a Drop Shadow – To make your wood textures stand out, consider adding a subtle drop shadow. Create a new layer below the texture and apply a soft shadow effect. Adjust the opacity and distance carefully to create a realistic sense of depth.
- Experiment with Generative Fill – Photoshop 2026’s Generative Fill can also be used to create additional texture variations, extend wood surfaces, or generate unique imperfections that would be difficult to paint manually.
Incorporating Wood Textures into Digital Art Projects
Now that you’ve mastered the art of creating wood textures in Photoshop, it’s time to explore how you can incorporate them into your digital art projects. Here are a few ideas to get you started:
- Backgrounds – Use wood textures as backgrounds for websites, social media graphics, presentations, or marketing materials. The warmth and natural character of wood can create an inviting and engaging visual experience for your audience.
- Product Mockups and Packaging Design – Wood textures work exceptionally well in product packaging, branding presentations, and product mockups. Whether you’re designing labels for organic products, coffee packaging, or luxury branding materials, realistic wood textures can add authenticity and premium appeal.
- Texturing 3D Models – If you work with 3D models, game assets, or architectural visualizations, applying wood textures can bring your creations to life. From furniture and flooring to interior designs and product renders, realistic wood textures add depth and realism.
- Digital Paintings and Illustrations – Incorporate wood textures into your digital paintings and illustrations to add depth and visual interest. Wood textures can serve as a foundation for realistic landscapes, still-life compositions, fantasy environments, and even portrait backgrounds.
- UI and Web Design – Natural textures are increasingly popular in modern web design. Subtle wood textures can help create rustic, handcrafted, or premium brand experiences when used carefully in website elements and hero sections.
- AI-Assisted Creative Projects – In Photoshop 2026, you can combine custom wood textures with Generative Fill to create unique backgrounds, expand scenes, and generate endless texture variations for creative projects.
Conclusion and Final Tips for Creating Stunning Wood Textures
Creating realistic wood textures in Photoshop is a valuable skill that can significantly enhance your digital artwork and design projects. By understanding the importance of texture, mastering Photoshop’s tools and techniques, and paying close attention to details such as lighting, grain patterns, imperfections, and color variation, you can create wood textures that look both realistic and visually compelling.
Photoshop 2026 offers more possibilities than ever before. Traditional techniques like brushes, gradients, blending modes, and texture overlays remain essential, while modern features such as Generative Fill and Smart Filters can help speed up your workflow and inspire new creative ideas.
Keep experimenting with different wood types, lighting conditions, and finishing effects. The more you practice, the more realistic and versatile your textures will become.
Embrace the beauty and warmth of natural wood, and use your new skills to create digital artwork, product designs, website graphics, and 3D projects that truly stand out.
If you’re looking for professional photo editing services, Mister Clipping Path can help bring your creative ideas to life. Our team of experienced designers and retouchers specializes in high-end image editing, retouching, background creation, and digital design services for businesses, photographers, and creative professionals worldwide.


Leave a Reply
Want to join the discussion?Feel free to contribute!