How to Create a Text Portrait Effect in Photoshop 2026
Introduction to Text Portrait Effect in Photoshop
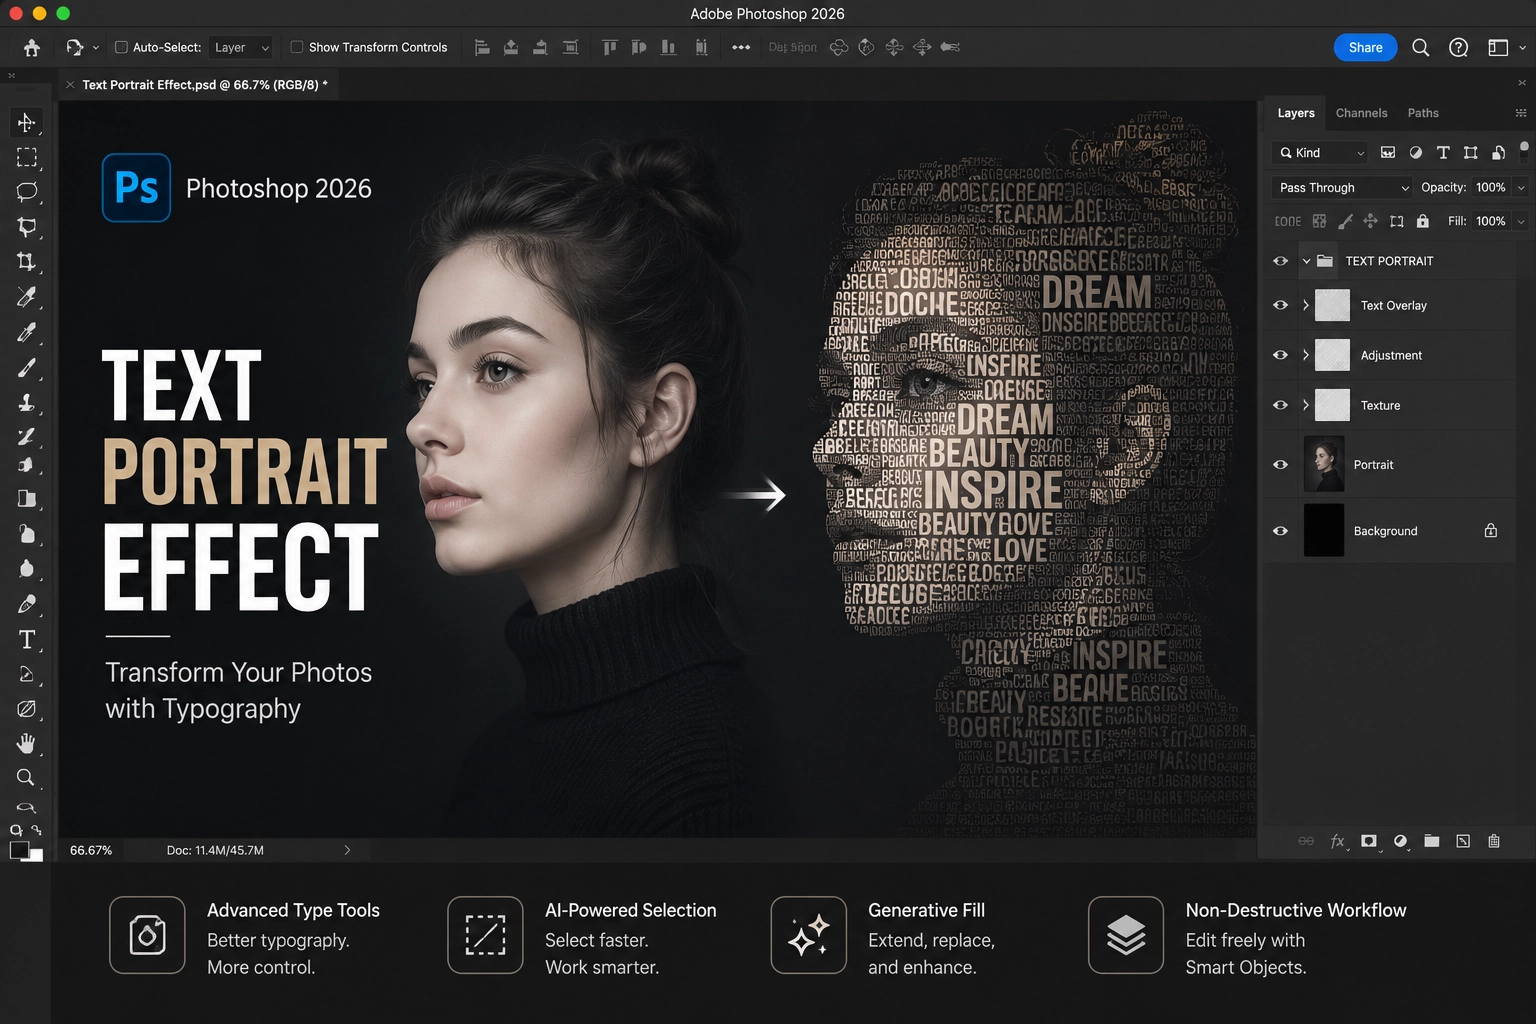
Photoshop has been a transformative tool in the digital art and design world, offering countless creative possibilities for artists, designers, and photographers. Among its many techniques, the Text Portrait Effect remains one of the most visually striking ways to combine typography and imagery into a single composition. In Photoshop 2026, creating text portraits has become even more flexible thanks to improved typography controls, AI-powered selection tools, and non-destructive editing workflows.
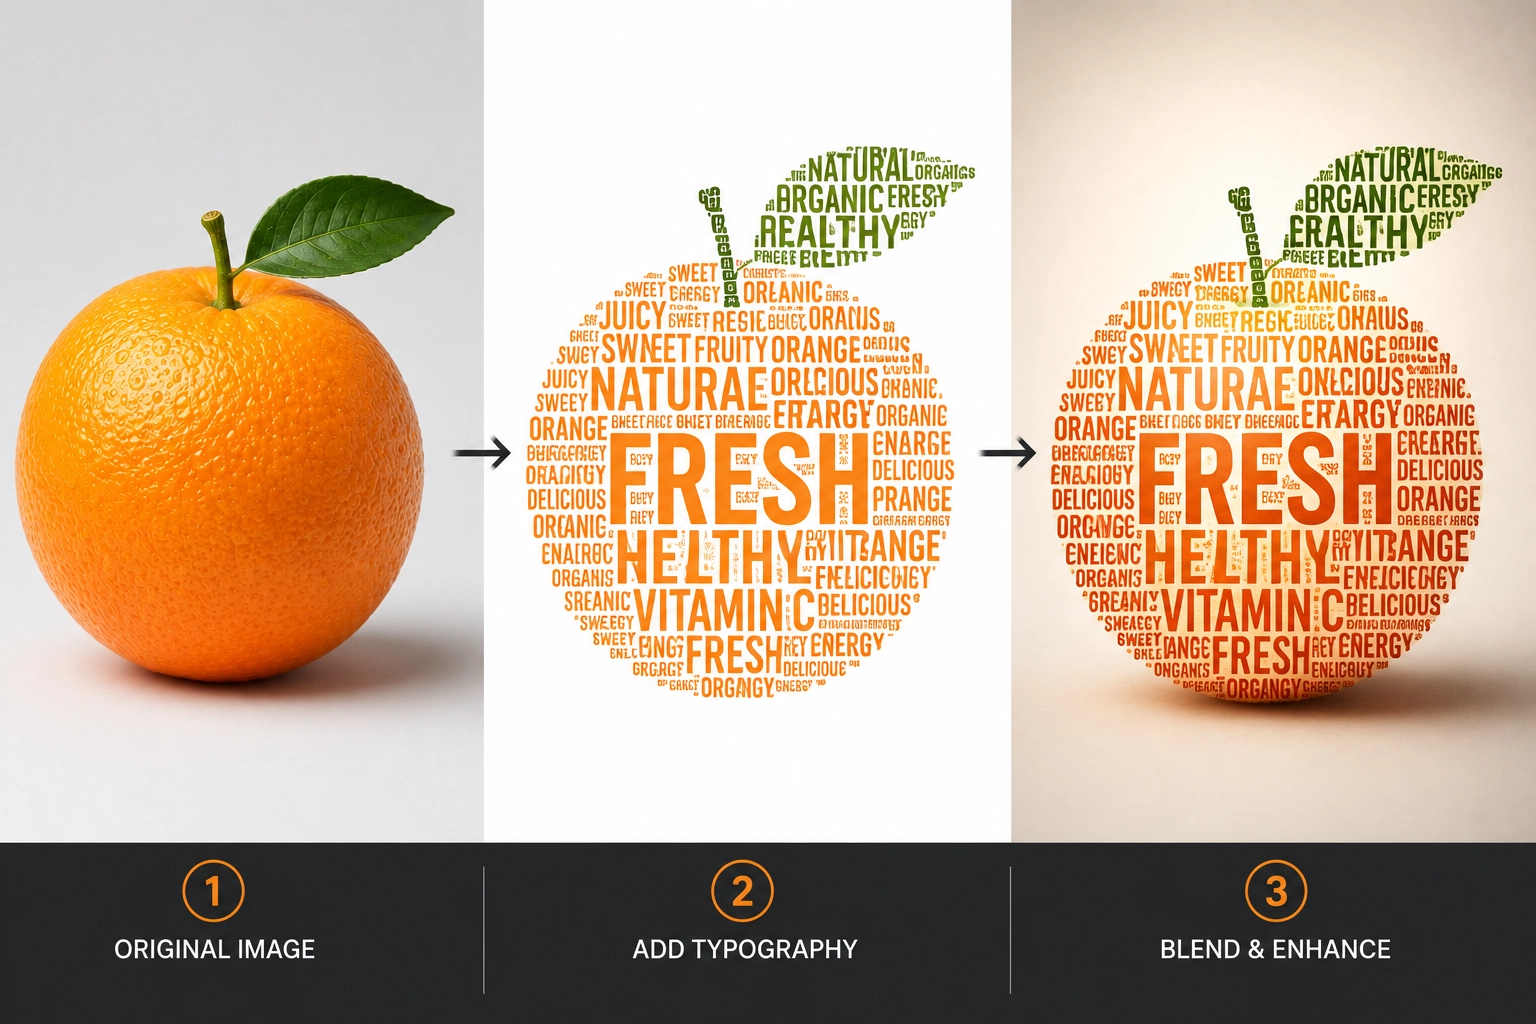
The text portrait effect in Photoshop is a creative technique where an image or portrait is filled with text. This text can be a single word, several words, or even an entire paragraph of text. The beauty of this technique lies in its ability to create a unique interplay between the visual and the textual, allowing the image to tell a story while the text adds another layer of meaning and personality.
The text portrait effect is popular among graphic designers, social media creators, and digital artists because it can transform simple portraits into eye-catching visual compositions. Whether you’re creating posters, album covers, marketing graphics, or personal artwork, this technique pushes the boundaries of creative expression and showcases the versatility of Photoshop as a design tool.
With Photoshop 2026, you can further enhance text portraits using modern features such as Smart Objects, advanced layer masking, and AI-assisted tools to refine your compositions more efficiently than ever before.
Importance of Creativity in Photoshop
Creativity is at the heart of Photoshop. It’s what separates the ordinary from the extraordinary and allows artists and designers to turn ideas into compelling visual stories. Whether you’re creating digital artwork, social media graphics, marketing materials, or personal projects, Photoshop provides endless opportunities for creative expression.
In Photoshop 2026, creativity goes beyond mastering tools and techniques. Modern features such as AI-assisted selections, Generative Fill, and advanced typography controls can speed up repetitive tasks, giving artists more time to focus on composition, storytelling, and experimentation. However, these tools are designed to enhance creativity, not replace it.
Creating a text portrait effect is a perfect example of combining technical skills with artistic vision. It encourages you to think outside the box by blending typography and imagery in a unique and meaningful way. Every choice, from the portrait selection and font style to text placement and contrast, contributes to the final visual impact.
Creativity in Photoshop also means experimenting without fear of making mistakes. Try different fonts, layouts, blending modes, and masking techniques to discover new possibilities. The more you explore and refine your ideas, the more distinctive and memorable your text portrait designs will become.
Ultimately, the text portrait effect demonstrates how Photoshop can transform simple elements like text and portraits into powerful pieces of digital art that capture attention and communicate emotion.
Step-by-step guide on creating text portrait effect in Photoshop
Creating a text portrait effect in Photoshop might seem challenging at first, especially if you’re new to the software. However, with a few simple techniques and Photoshop 2026’s improved tools, you can create stunning typography portraits with ease.
Step 1: Choose the Right Portrait – Start by selecting a high-resolution portrait with good lighting and strong facial features. Portraits with clear contrast and a simple background generally produce the best text portrait results.
Step 2: Prepare Your Document – Open your image in Photoshop and duplicate the original layer to preserve your source image. Working non-destructively gives you the flexibility to experiment without affecting the original file.
Step 3: Remove or Simplify the Background – If necessary, use Photoshop 2026’s Object Selection Tool or Remove Background feature to isolate your subject and create a cleaner composition.
Step 4: Add Your Text – Select the Type Tool and start adding your desired text. You can use a single word, quotes, song lyrics, names, or even paragraphs depending on the effect you want to achieve.
Step 5: Experiment with Typography – Try different fonts, font weights, spacing, and alignments. Bold fonts often create stronger visual impact, while smaller text blocks can reveal more facial details.
Step 6: Create the Text Portrait Effect – Arrange the text over the portrait and use Layer Masks and Clipping Masks to blend the typography into the image. Adjust the text placement to follow the contours of the face and create a more natural composition.
Step 7: Refine the Composition – Experiment with Blend Modes such as:
- Overlay
- Soft Light
- Screen
- Multiply
These blending modes can help integrate the text with the portrait and create unique visual effects.
Step 8: Add Final Enhancements –
Use Adjustment Layers, such as:
- Curves
- Levels
- Black & White
- Gradient Map
These adjustments can dramatically improve contrast and help the text stand out.
Step 9: Enhance with Smart Objects – Convert your text layers into Smart Objects so you can easily edit typography and apply effects non-destructively.
Step 10: Experiment with AI-Powered Tools – In Photoshop 2026, Generative Fill can help extend backgrounds or create additional design elements around your portrait, while AI-assisted selection tools can significantly speed up your workflow.
Step 11: Save and Export – Once you’re satisfied with the result, save the project as a PSD file for future editing and export your final artwork in your preferred format.
Congratulations! You’ve successfully created a stunning text portrait effect in Photoshop. With practice and experimentation, you’ll develop your own unique style and create typography portraits that truly stand out.
Tips to enhance your text portrait effect
Creating a text portrait effect in Photoshop is an art in itself, and like any art, it can be refined with a few tips and tricks. Here are some techniques to help you create more visually appealing and professional-looking text portraits.
One tip is to play with the opacity of your text layer. By lowering the opacity, you can create a more subtle and nuanced text portrait effect. This can add depth and complexity to your image, making it more visually appealing. In Photoshop 2026, you can also experiment with layer masks and blend modes to achieve smoother and more natural transitions.
Another tip is to experiment with different fonts and font sizes. Different fonts can convey different moods and emotions, and by playing with font sizes, spacing, and alignment, you can create a sense of depth and perspective in your image. Photoshop 2026’s improved typography controls and support for variable fonts give you even more creative flexibility.
Lastly, don’t forget about color. Even though you’re working with text, color can still play a significant role in your composition. By using colors that complement your portrait, you can enhance the visual impact of your text portrait effect. Adjustment Layers and Gradient Maps can also help you fine-tune colors and create a more cohesive final design.
Common mistakes to avoid when creating text portrait effect
While creating a text portrait effect in Photoshop can be a fun and rewarding process, it’s also easy to make mistakes. Here are some common ones to watch out for.
One common mistake is using too much text. While it’s true that the text portrait effect relies on typography, you don’t want to overdo it. If your image is too cluttered with text, it can distract from the portrait itself and reduce its visual impact. Sometimes, using fewer words and creating more breathing room produces a much stronger composition.
Another mistake is not paying attention to the readability of your text. If your text is too small, too faint, or uses a font that’s difficult to read, it can undermine the effectiveness of your design. In Photoshop 2026, improved typography controls and variable fonts make it easier to adjust size, spacing, and weight, so take advantage of these tools to improve readability.
Lastly, don’t forget about the importance of composition and non-destructive editing. Make sure your text follows the natural shape and contours of the portrait, and avoid awkward placements that break the flow of the image. It’s also a good practice to work with Smart Objects and Layer Masks so you can easily refine your design without starting over.
Conclusion
The text portrait effect in Photoshop remains one of the most creative and visually striking typography techniques in Photoshop 2026. It combines photography, typography, and artistic composition to create unique designs that capture attention and communicate emotion.
Creating successful text portraits requires creativity, experimentation, and attention to detail. While modern features such as AI-assisted selections, Smart Objects, and Generative Fill can make the workflow faster and more flexible, the key to a great text portrait still lies in thoughtful typography and strong composition.
The more you experiment with different fonts, layouts, colors, and blending techniques, the more you’ll discover what’s possible with Photoshop. Don’t be afraid to push creative boundaries and develop your own unique style.
If you’re looking for professional photo editing services, Mister Clipping Path is here to help. Our team of experienced photo editors and retouchers specializes in creative photo manipulation, high-end retouching, and custom Photoshop effects for photographers, agencies, and businesses worldwide. Whether you need a simple edit or a complex creative project, we’re ready to bring your ideas to life.


Leave a Reply
Want to join the discussion?Feel free to contribute!