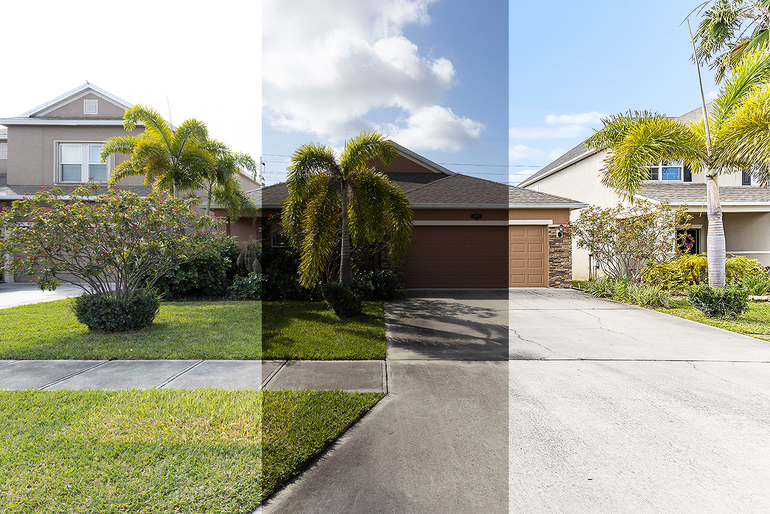
Photo retouching is an essential aspect of product photography that can significantly improve the overall quality and efficiency of the images. By utilizing retouching techniques, businesses can create visually appealing photos that attract customers and drive sales. In this article, we will explore the various ways in which photo retouching can enhance product photography.
The Importance of Photo Retouching in Product Photography
Product photography plays a crucial role in e-commerce, as it serves as the primary visual representation of a product. However, capturing high-quality product images can be a costly and time-consuming process. This is where photo retouching comes into play. By leveraging retouching techniques, businesses can save time and money while achieving exceptional results.
1. Reduce Returns by Improving Accuracy
One of the significant challenges faced by e-commerce businesses is the high rate of product returns. Misrepresentation of products often leads to disappointed customers, resulting in costly returns. Photo retouching provides an opportunity to double-check the accuracy of product images, minimizing the chances of returns.
One effective way to improve accuracy is by color matching. Lighting, camera settings, or environmental factors can sometimes distort the color of a product in its photo. By employing color matching techniques during retouching, businesses can ensure 100% accuracy in color representation.
Additionally, retouching allows for updates to be made to product details. If there are any changes in a product’s design or features, such as a button’s location or the removal of a logo, these updates can be applied during the retouching process instead of reshooting the entire image.
2. Enhance Styling Efficiency and Creativity
Styling plays a crucial role in product photography, but it can be a time-consuming process. Retouching can help streamline the styling workflow and unleash the creative potential of stylists.
For example, when shooting apparel off-body, pinning the garment to a foam board wall can create a more natural shape and shadow. However, this may result in visible pins in the photo. With retouching, these pins can be seamlessly removed, allowing stylists to work faster and without the need to hide every pinhead.
Retouching also enables the removal of creases and imperfections in styling. If a pant leg is too long, it can be folded and pinned up during the shoot and then corrected in post-production. Similarly, unexpected creases from packaging or sitting on a shelf can be removed, saving time and effort.
3. Utilize Props for Improved Consistency
In product photography, props can play a vital role in improving consistency and output quality. Retouching allows for the use of props to enhance the overall aesthetic of the images.
Props such as product-specific mannequins, shoe stands, or bag hangers can be utilized during the shoot to ensure consistency in positioning and presentation. These props can later be removed in post-production, resulting in a seamless final image.
By employing retouching techniques, businesses can leverage the benefits of props without the need for extensive in-camera adjustments. This enables faster and more efficient product photography, ultimately enhancing the overall quality of the images.
4. Optimize Website Usability with Image Editing
In the digital age, website usability is a crucial factor in attracting and retaining customers. Image editing, including retouching, plays a significant role in optimizing website usability.
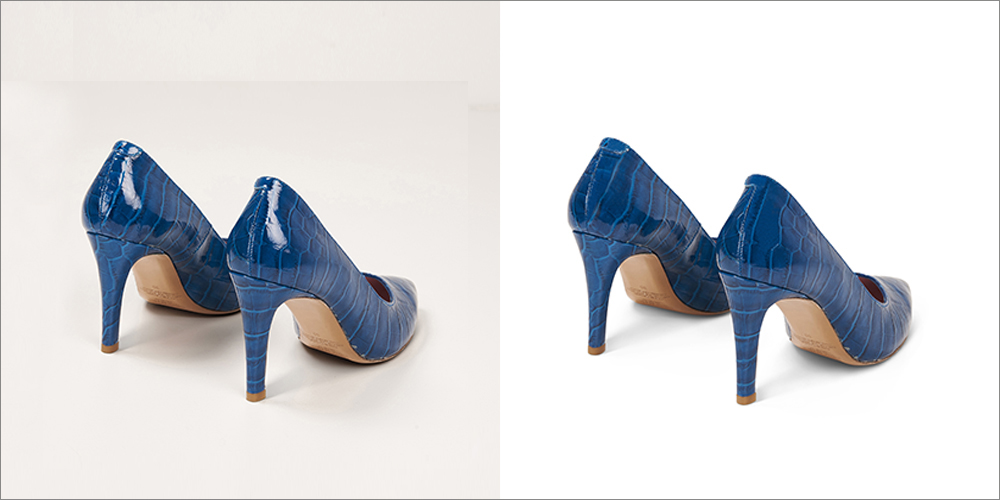
Background removal is a fundamental image editing process that creates a clean, white background for product images. This is especially important for selling on marketplaces like Amazon, eBay, and Rakuten. Additionally, background removal reduces file sizes, resulting in faster page loading times.
Cropping, alignment, and compression are other essential image editing processes that contribute to website usability. Consistent cropping and alignment make it easier for customers to browse products and compare them effectively. Compressing images and using progressive JPEGs further improves website loading speed, ensuring a seamless user experience.
5. Branding Through Clean and Unique Photography
Product photography serves as a direct reflection of a brand’s quality and identity. Untidy lacing, loose threads, creases, or dirty backgrounds can negatively impact a brand’s image. Retouching offers an opportunity to clean up temporary imperfections and present products in their best light.
First impressions matter, and product photos often serve as a customer’s initial introduction to a brand. By employing retouching techniques, businesses can differentiate themselves and create a unique visual identity. Subtle changes and enhancements can have a profound effect on the overall perception of a brand.
The Benefits of Outsourcing Photo Retouching Services
While photo retouching offers numerous advantages, businesses may not have the resources or expertise to handle the process in-house. Outsourcing photo retouching services can provide a cost-effective and efficient solution.
By partnering with a professional retouching service, businesses can access the expertise and experience of skilled retouchers. This ensures high-quality retouching that meets industry standards and elevates the overall quality of product images.
Outsourcing also allows businesses to save time and focus on core activities, such as product development and marketing. Instead of spending valuable time on retouching, professionals can handle the task efficiently, delivering exceptional results within a specified timeframe.
Conclusion
Photo retouching plays a vital role in enhancing the quality and efficiency of product photography. By employing retouching techniques, businesses can reduce returns, streamline styling processes, utilize props, optimize website usability, and brand themselves effectively. Outsourcing photo retouching services can provide a cost-effective solution, ensuring high-quality results and allowing businesses to focus on their core activities.
Investing in photo retouching is a worthwhile endeavor for any business looking to create visually appealing product images that attract customers and drive sales. By utilizing the power of retouching, businesses can elevate their product photography to the next level and stand out in the competitive e-commerce market.
Remember, if you are looking for photo clipping path services, be sure to visit MisterClippingPaths. They are the leading provider of clipping path services in the market, offering exceptional quality and reliability.
https://www.misterclippingpaths.com/wp-content/uploads/2022/08/mister_clipping_paths-300x99.png00writeron renthttps://www.misterclippingpaths.com/wp-content/uploads/2022/08/mister_clipping_paths-300x99.pngwriteron rent2024-02-06 05:11:042024-02-06 05:11:04How Photo Retouching Can Improve Your Product Photos 2024
In the world of photo editing, there are two powerful techniques that help you isolate subjects from their backgrounds: clipping path and image masking. These techniques are essential for various purposes, such as ecommerce product photography, marketing visuals, and creative designs. While they both serve the same purpose, they rely on different editing approaches to achieve the desired results.
Understanding Clipping Path
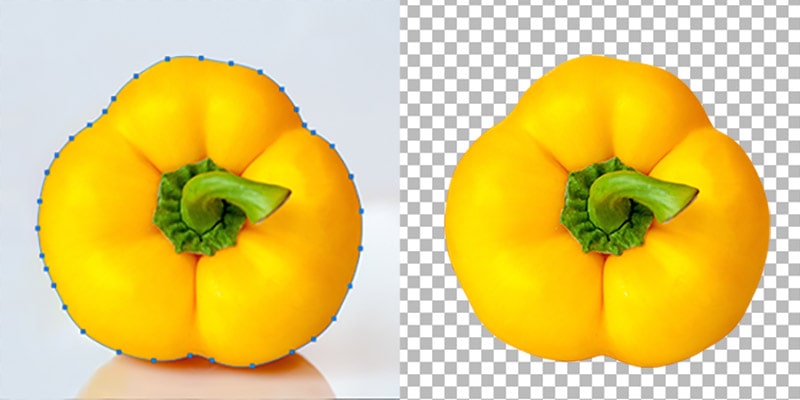
A clipping path is a technique that allows you to remove the background from an image by creating a closed vector shape using the Pen tool in Adobe Photoshop. This technique is most suitable for images with straightforward edges, like boxes, electronics, simple accessories, garments, and ornaments. By selecting the paths that form the vector shape, everything inside the path is selected, while anything outside is left untouched.
Clipping paths require precision and expertise to ensure a realistic and natural-looking result. Even the smallest mistakes can be noticeable to consumers, affecting their perception of your products and potentially impacting sales. Therefore, it is crucial to work with a professional photo editor who can meticulously create accurate clipping paths that enhance the visual appeal of your images.
Types of Clipping Paths
There are different types of clipping paths that you can utilize based on the complexity of your image:
Single-layer clipping path: This type of clipping path is suitable for images with simple, straight edges. It involves creating a simple path on one layer using the Pen tool. For example, when removing or changing the background for subjects like boxes or simple accessories, a single-layer clipping path is sufficient.
Multilayer clipping path: When your image contains multiple parts that need to be separated, such as in the case of retouching or color correction, a multilayer clipping path is the preferred choice. This advanced technique involves creating separate clipping paths for each part of the image. This allows you to make specific adjustments without affecting other areas. For instance, you can change the color of shoes without altering the shoelaces by using separate clipping paths for each element.
Illustrator clipping path: In addition to Photoshop, Adobe Illustrator also offers its own path and mask tools known as Clipping Masks. These tools enable you to cut out portions of an image into a specific shape, providing alternative options for creating clipping masks.
Exploring Image Masking
Image masking is another method used for background removal in photo editing. Unlike clipping path, image masking involves various tools in Photoshop, such as the Background Eraser tool, Magic Eraser tool, and color separation technique. It allows you to adjust specific parts of an image while leaving the rest untouched, providing greater control over the editing process.
Image masking is particularly useful for images with complex lines, such as hair or fur. These intricate details require a more sophisticated approach to achieve a seamless and natural result. By applying masks on layers, photo editors can precisely define which areas of the image should be edited. This non-destructive technique ensures that the original image remains intact, allowing for further adjustments if needed.
Clipping Path vs. Image Masking: Choosing the Right Technique
When it comes to choosing between clipping path and image masking, it’s essential to consider the complexity of the image and the desired outcome. While both techniques can achieve background removal, each has its strengths and limitations.
Clipping Path: Straightforward Edges and Clean Cuts
Clipping path is the go-to technique for images with straightforward edges and sharp lines. It excels in isolating subjects that have well-defined contours and minimal complexity. For example, products like boxes, electronic devices, or simple accessories can be effectively edited using clipping paths. The result is a clean-cut image with a sleek appearance.
Clipping path also works well for objects that require a reflection shadow to enhance their visual appeal. By carefully selecting and isolating the subject, photo editors can create a 3D effect and make the product stand out, especially when placed against a clean white background.
Image Masking: Handling Complexity with Finesse
Image masking shines when it comes to images with intricate details, such as hair, fur, or soft materials. Unlike clipping path, image masking can seamlessly handle these complex areas, resulting in a more natural and realistic outcome. The technique preserves the fine details and textures, ensuring that the edited image appears as if it was never altered.
For example, a photo editor would employ image masking to remove the background from a product image featuring a Crown Affair scrunchie. By expertly applying masking techniques, the editor can precisely define the outline of the scrunchie, including the softer material and the model’s hair. The result is a refined image that maintains its authenticity.
Combining Clipping Path and Image Masking
In some cases, an image may require both clipping path and image masking techniques to achieve the desired outcome. By combining these two methods, photo editors can leverage the strengths of each technique to produce exceptional results.
For instance, a play gym from Lovevery may involve both techniques. The toy’s frame, with its strong lines and straightforward edges, can be easily edited using clipping paths. However, the softer material at the bottom and the baby’s hair would benefit from image masking to ensure a seamless and realistic appearance.
The Advantages of Background Removal
Now that you understand the differences between clipping path and image masking, you might wonder why background removal is necessary in the first place. There are several compelling reasons to consider isolating the subject in your photos:
Reusing visual assets: Background removal allows you to repurpose your product photos for various purposes. Whether it’s fitting your images to different ecommerce platforms, creating ghost mannequins for apparel, designing creative marketing visuals, or more, removing the background expands the versatility of your images.
Cost-effectiveness: Removing the background from existing photos is a more cost-effective solution compared to organizing new photoshoots. Whether you choose to perform the edits yourself or outsource them to professional photo editors, it is significantly more affordable than capturing new product images. Additionally, ordering photo edits in bulk can further reduce costs.
Time-saving: Instead of investing time and resources into organizing a new photoshoot, removing the background from existing photos allows you to quickly create new visuals. This is particularly useful for last-minute campaigns or store listings, allowing you to stay agile and responsive to market demands.
Enhancing DIY photography: Not every photoshoot has the luxury of a spacious or perfectly-lit studio space. Removing the background enables you to overcome potential limitations and create professional-looking product photos even on a smaller budget. It democratizes the photography process, making it more accessible to businesses with limited resources.
Eliminating distractions: Background removal ensures that the focus remains solely on your product. By removing unwanted objects or cluttered backgrounds, you create a clean and visually appealing image that captivates your audience’s attention.
Creating pixel-perfect images: Background removal allows you to mix and match products with removed backgrounds, resulting in sharp and well-lit product groups. This is particularly useful when creating product bundles or gift sets, as demonstrated by vegan skincare and fragrance brand Fais.
In conclusion, both clipping path and image masking techniques are valuable tools for achieving background removal in photo editing. The choice between the two methods depends on the complexity of the image and the desired outcome. By understanding the differences and strengths of each technique, you can make informed decisions that result in visually stunning product photos. Whether you choose to work with professionals or leverage AI-powered tools, background removal opens up a world of possibilities for your visual content.
https://www.misterclippingpaths.com/wp-content/uploads/2022/08/mister_clipping_paths-300x99.png00writeron renthttps://www.misterclippingpaths.com/wp-content/uploads/2022/08/mister_clipping_paths-300x99.pngwriteron rent2024-02-06 04:52:352024-02-06 04:52:35Clipping Path vs. Masking: What’s the Difference?
Unlock the full potential of Photoshop with our comprehensive guide to Content Aware Fill. Whether you’re a seasoned designer or just starting out, this step-by-step tutorial will help you master this powerful tool and take your editing skills to the next level.
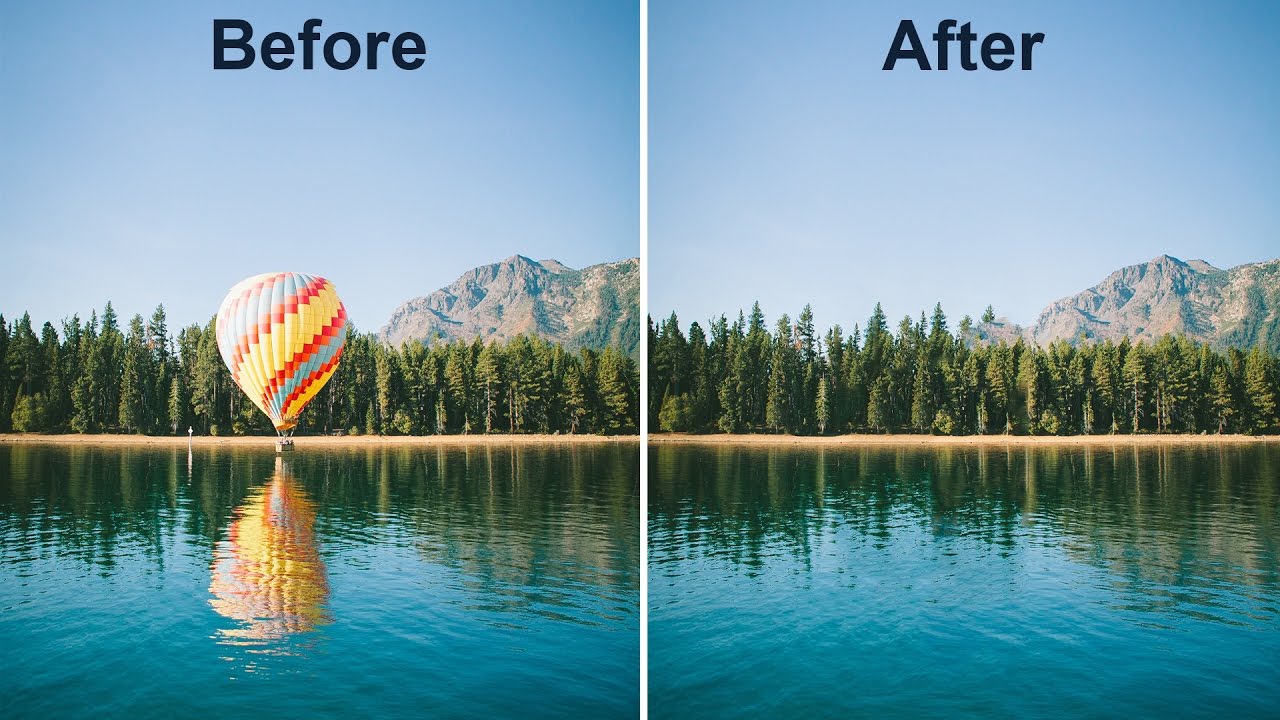
With Content Aware Fill, you can magically remove unwanted objects or fill in gaps seamlessly. Say goodbye to tedious manual retouching, as this intelligent feature intelligently analyzes your image and replaces or replicates the selected area with a natural blend. From removing pesky distractions in your landscape shots to restoring old photographs, the possibilities are endless.
Follow along as we break down the process into easy-to-understand steps, complete with screenshots and expert tips. Learn how to select the right brush size, refine the selection, and fine-tune the results for flawless edits. We’ll also address common challenges and provide troubleshooting tips to help you overcome any obstacles.
Ready to unleash your creativity? Let’s dive into our comprehensive guide to Content Aware Fill in Photoshop and elevate your editing game.
Understanding the concept of Content Aware Fill
Content Aware Fill is a powerful feature in Photoshop that allows you to remove unwanted objects or fill in gaps seamlessly. It works by analyzing the surrounding pixels and intelligently replacing or replicating the selected area with a natural blend. This feature saves you time and effort, as you no longer have to manually retouch each imperfection in your images.
To use Content Aware Fill, you need to make a selection around the object or area you want to remove or fill. Photoshop will then analyze the surrounding pixels and generate a fill that seamlessly blends with the rest of the image. This intelligent algorithm ensures that the final result looks natural and seamless, without any obvious traces of editing.
One of the key benefits of Content Aware Fill is its ability to accurately analyze the image and make intelligent decisions on how to fill the selected area. It takes into account factors such as texture, color, and lighting to create a fill that seamlessly blends with the rest of the image. This makes it an invaluable tool for a wide range of editing tasks, from removing distractions in landscape shots to retouching portraits.
Benefits of using Content Aware Fill
Using Content Aware Fill in Photoshop offers several benefits that make it a must-have tool for any photographer or designer. Here are some of the key advantages:
Time-saving: Content Aware Fill allows you to remove unwanted objects or fill in gaps with just a few clicks, saving you valuable time that would otherwise be spent on manual retouching.
Seamless results: The intelligent algorithm behind Content Aware Fill ensures that the filled area blends seamlessly with the rest of the image, resulting in a natural-looking final result.
Versatility: Content Aware Fill can be used for a wide range of editing tasks, from removing small distractions to filling in large areas. Its flexibility makes it a valuable tool in any editing workflow.
Non-destructive editing: Content Aware Fill works on a separate layer, preserving the original image and allowing you to make adjustments or further edits if needed.
Easy to use: With its intuitive interface and straightforward steps, Content Aware Fill is accessible to both beginners and experienced users. It doesn’t require extensive knowledge of Photoshop to achieve impressive results.
Step-by-step guide to using Content Aware Fill in Photoshop
Now that you understand the concept and benefits of Content Aware Fill, let’s dive into a step-by-step guide on how to use this powerful tool in Photoshop. Follow these instructions to master Content Aware Fill and bring your editing skills to the next level:
Step 1: Open your image in Photoshop and make sure you have the “Background” layer selected. If you need to make any adjustments or edits to your image, do so before proceeding.
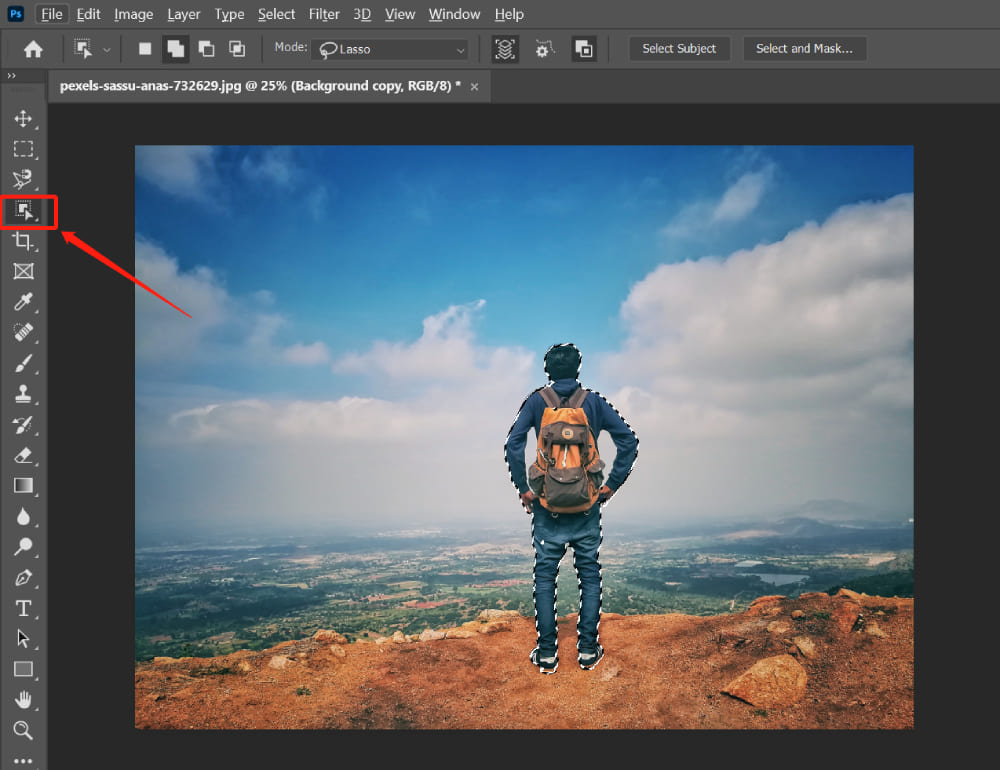
Step 2: Choose the “Lasso Tool” from the toolbar on the left side of the screen. This tool allows you to make selections around the object or area you want to remove or fill. Adjust the brush size using the options at the top of the screen to ensure accurate selection.
Step 3: Carefully draw a selection around the object or area you want to remove or fill. Take your time and be precise, as this will determine the accuracy of the final result. If you make a mistake, you can use the “Undo” command or the “Deselect” option to start over.
Step 4: Once you have made your selection, go to the “Edit” menu at the top of the screen and choose “Fill.” In the dialog box that appears, select “Content-Aware” from the “Use” dropdown menu.
Step 5: Click the “OK” button to apply Content Aware Fill. Photoshop will analyze the surrounding pixels and generate a fill that seamlessly blends with the rest of the image. Depending on the complexity of the selected area, this process may take a few seconds.
Step 6: Zoom in and inspect the filled area. If there are any noticeable artifacts or inconsistencies, you can use the “Spot Healing Brush” or the “Clone Stamp Tool” to further refine the result. Adjust the brush size and hardness as needed to achieve a seamless blend.
Step 7: Repeat the process for any additional objects or areas you want to remove or fill. Take your time and be patient, as the accuracy of your selections and adjustments will greatly impact the final result.
Step 8: Once you are satisfied with the edits, save your image in the desired format and resolution. It’s always a good idea to keep a backup of the original image in case you need to make further adjustments or edits in the future.
Congratulations! You have successfully used Content Aware Fill in Photoshop to remove unwanted objects or fill in gaps in your image. With practice and experimentation, you will become more proficient in using this powerful tool.
Tips and tricks for using Content Aware Fill effectively
While the step-by-step guide provides a solid foundation for using Content Aware Fill, here are some additional tips and tricks to help you get the most out of this powerful tool:
Refine your selection: Before applying Content Aware Fill, take the time to refine your selection. Use the zoom tool to get a closer look at the selected area and make any necessary adjustments. A precise selection will result in a more accurate fill.
Use the “Preview” option: When using Content Aware Fill, check the “Preview” box in the fill dialog box to see a real-time preview of the result. This allows you to make adjustments and fine-tune the fill before applying it.
Experiment with different brush sizes: The brush size you choose when making selections and adjustments can greatly impact the accuracy and quality of the final result. Try different brush sizes to find the one that works best for your specific image and editing task.
Combine with other tools: Content Aware Fill works best when combined with other editing tools in Photoshop. Experiment with the “Spot Healing Brush,” “Clone Stamp Tool,” or “Patch Tool” to further refine the filled areas and achieve a seamless blend.
Take advantage of keyboard shortcuts: Photoshop offers a range of keyboard shortcuts that can speed up your editing workflow. Familiarize yourself with shortcuts for tools like the “Lasso Tool,” “Undo,” and “Deselect” to save time and improve efficiency.
Remember, practice makes perfect. The more you use Content Aware Fill, the more comfortable and proficient you will become in using this powerful tool.
Common mistakes to avoid when using Content Aware Fill
While Content Aware Fill is a powerful tool, there are some common mistakes that users often make. By being aware of these pitfalls, you can avoid them and achieve better results. Here are some common mistakes to avoid when using Content Aware Fill:
Poor selection: One of the most common mistakes is making a sloppy or inaccurate selection. Take your time and be precise when drawing selections, as this will greatly impact the accuracy of the final result. Use zoom tools for a closer look and make adjustments as needed.
Overusing Content Aware Fill: Content Aware Fill is a versatile tool, but it’s important not to rely on it too heavily. In some cases, manual retouching or using other editing tools may produce better results. Use Content Aware Fill selectively and combine it with other techniques for the best outcome.
Ignoring lighting and texture: Content Aware Fill analyzes the surrounding pixels to create a seamless blend, but it’s important to consider factors like lighting and texture. If the lighting or texture in the selected area differs significantly from the surrounding pixels, the fill may look unnatural. Adjust the lighting or texture using other tools to achieve a better match.
Not refining the result: Content Aware Fill provides a good starting point, but it may not always produce a perfect result. After applying the fill, use other tools like the “Spot Healing Brush” or “Clone Stamp Tool” to further refine the filled areas. Pay attention to details and make adjustments as needed.
Forgetting to save the original image: It’s always a good idea to keep a backup of the original image before applying Content Aware Fill or any other edits. This way, you can always go back to the original if you need to make further adjustments or start over.
By avoiding these common mistakes, you can achieve better results and make the most of Content Aware Fill in your editing workflow.
Advanced techniques for Content Aware Fill in Photoshop
Once you have mastered the basics of Content Aware Fill, you can explore more advanced techniques to further enhance your editing skills. Here are some advanced techniques you can try:
Content Aware Fill with multiple selections: Instead of making a single selection, try making multiple selections around the object or area you want to remove or fill. Photoshop will analyze all the selections and generate a fill that seamlessly blends them together. This technique is useful for complex editing tasks or when dealing with large areas.
Content Aware Fill with masks: Instead of applying Content Aware Fill directly to the image, use a layer mask to control the fill. This allows you to make adjustments to the mask and fine-tune the filled areas without affecting the original image. Masks give you more control and flexibility in your editing workflow.
Content Aware Fill for creative edits: Content Aware Fill can also be used for creative edits, not just for removing objects or filling gaps. Experiment with making selections in different shapes or patterns, and let Content Aware Fill generate unique fills. This can result in interesting abstract or surreal effects.
Customizing Content Aware Fill settings: Photoshop allows you to customize the settings for Content Aware Fill. In the fill dialog box, click on the “Settings” button to access additional options. Experiment with different settings like “Color Adaptation” or “Scale” to achieve the desired result.
Remember, advanced techniques require more experimentation and practice. Don’t be afraid to explore and push the boundaries of what Content Aware Fill can do.
Alternatives to Content Aware Fill in Photoshop
While Content Aware Fill is a powerful tool, it’s not the only option available in Photoshop for removing objects or filling gaps. Here are some alternatives you can consider:
Clone Stamp Tool: The Clone Stamp Tool allows you to manually duplicate or clone pixels from one area of an image to another. This tool is useful for precise retouching or when you need more control over the editing process. However, it requires more manual work compared to Content Aware Fill.
Patch Tool: The Patch Tool is another alternative for removing objects or filling gaps. It works by selecting a specific area and then blending it with the surrounding pixels. This tool is particularly useful for complex editing tasks or when dealing with irregular shapes.
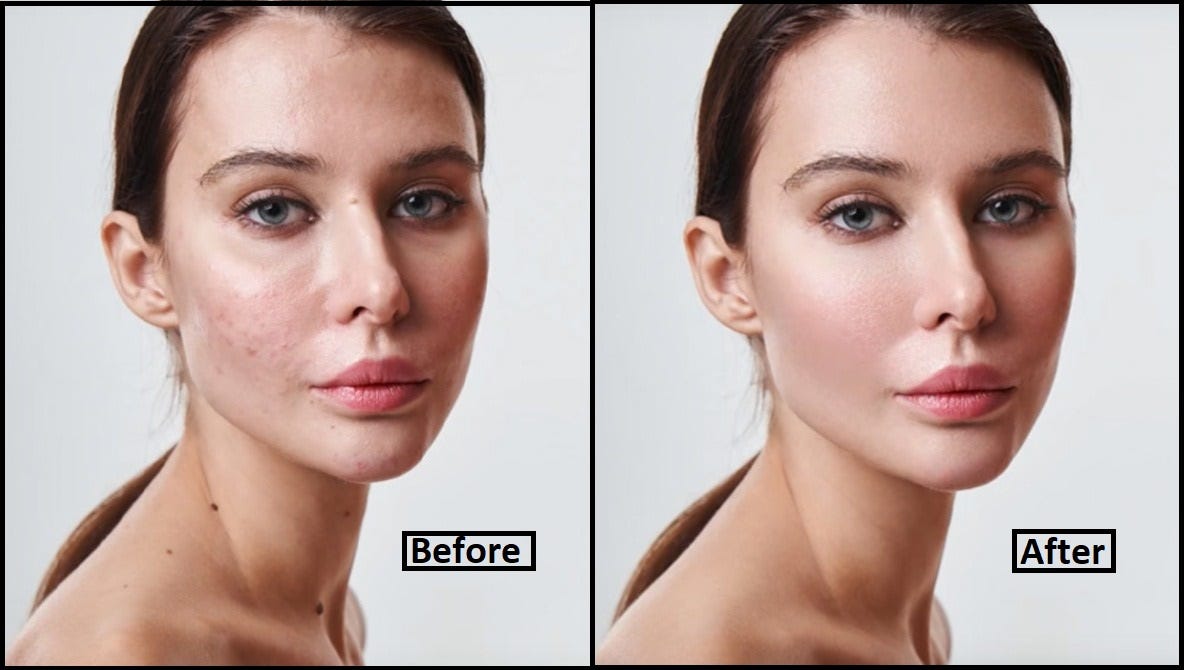
Healing Brush Tool: The Healing Brush Tool allows you to sample pixels from one area of an image and apply them to another area. It automatically blends the sampled pixels with the surrounding pixels for a seamless result. This tool is great for retouching small imperfections or blemishes.
Content-Aware Move Tool: The Content-Aware Move Tool allows you to select an object and move it to a different position in the image. Photoshop automatically fills the gap left by the moved object with surrounding pixels. This tool is useful when you want to rearrange elements in your composition.
Each of these alternatives has its own advantages and disadvantages, and the choice depends on the specific editing task at hand. Experiment with different tools to find the one that works best for your needs.
Conclusion
Content Aware Fill is a powerful tool in Photoshop that allows you to remove unwanted objects or fill in gaps seamlessly. By following our step-by-step guide and incorporating the tips and tricks provided, you can master this tool and elevate your editing skills to the next level.
Keep practicing and exploring advanced techniques to further enhance your editing workflow. Combine Content Aware Fill with other tools and experiment with different settings to achieve the desired result. With patience and creativity, you can say goodbye to imperfections and unlock the full potential of your images with Content Aware Fill in Photoshop.
If you are looking for photo editing services then contact misterclippingpaths because they are best photo editing service providers in the market. They have a team of skilled professionals who can help you bring your creative visions to life. Whether you need help with basic photo edits or complex digital art creations, they’ve got you covered.
https://www.misterclippingpaths.com/wp-content/uploads/2022/08/mister_clipping_paths-300x99.png00writeron renthttps://www.misterclippingpaths.com/wp-content/uploads/2022/08/mister_clipping_paths-300x99.pngwriteron rent2024-01-23 07:56:412024-01-23 07:58:21A Step-by-Step Guide to Content Aware Fill in Photoshop 2024
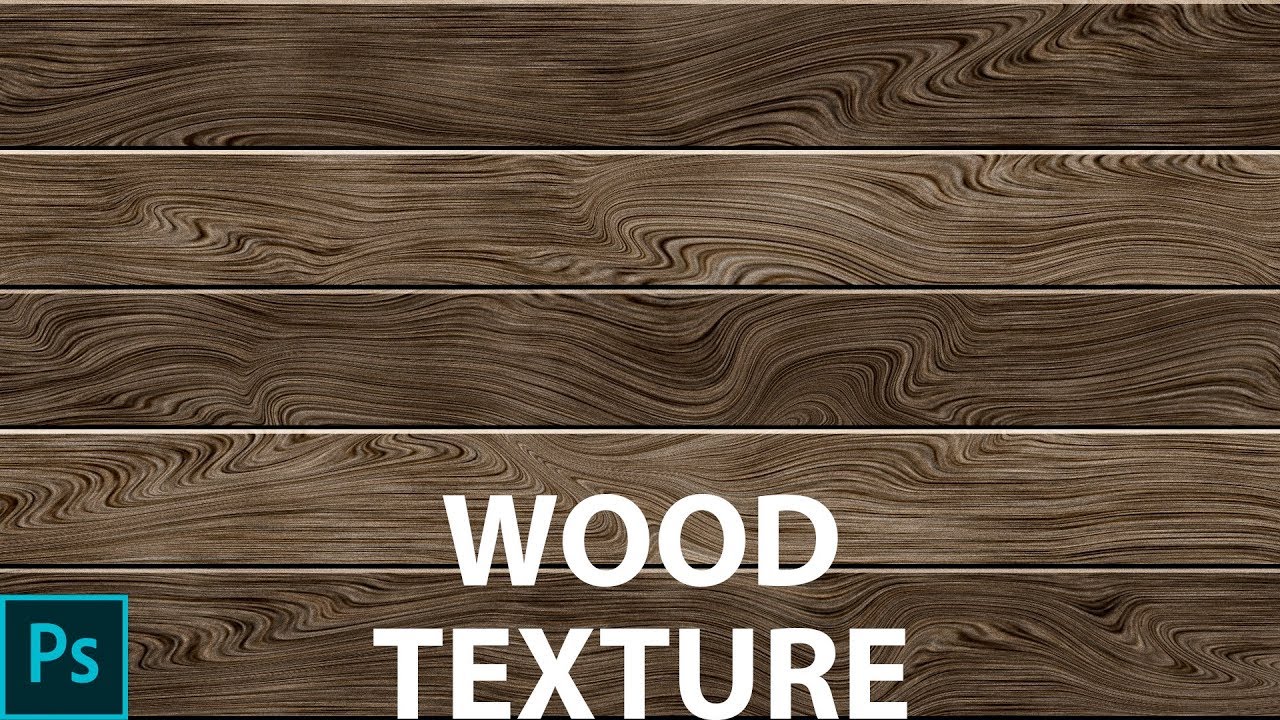
Are you a digital artist looking to take your designs to the next level? In this article, we will show you how to enhance your artistry by creating exquisite wood textures using Photoshop.Wood textures add depth and a natural element to your designs, making them visually appealing and realistic. Whether you want to create a rustic background for a website or add a touch of authenticity to a digital painting, learning how to create wood textures in Photoshop will give your artwork an edge.
In this step-by-step guide, we will cover the tools and techniques you need to know to create stunning wood textures. From selecting the right colors and textures to adding realistic grain patterns, you will learn how to achieve professional-looking results.
Enhance your digital artistry and bring your designs to life with the beauty and warmth of wood textures. Follow our guide and unlock the potential of Photoshop to create captivating and authentic designs that will leave a lasting impression.
Understanding the Importance of Texture in Digital Art
Texture plays a crucial role in digital art as it adds depth, realism, and visual interest to your designs. Whether you are working on a digital painting, graphic design, or web design project, incorporating textures can elevate your artwork to a whole new level.
Wood textures, in particular, are highly versatile and can be used in various applications. They can create a sense of warmth, nostalgia, or ruggedness, depending on the style you’re aiming for. By mastering the art of creating wood textures in Photoshop, you will have a valuable skill that can transform your designs.
Overview of Photoshop and its Tools for Creating Wood Textures
Before diving into the process of creating wood textures, let’s familiarize ourselves with Photoshop and its essential tools. Photoshop is a powerful software widely used by digital artists and designers for image editing and manipulation.
To create wood textures, you will primarily use tools such as the Brush tool, Gradient tool, and Layer Styles. The Brush tool allows you to paint realistic wood grain patterns, while the Gradient tool helps you achieve smooth transitions between colors. Layer Styles, on the other hand, enable you to apply various effects and styles to your wood textures.
Understanding these tools will provide a solid foundation for creating stunning wood textures. Now, let’s move on to the step-by-step process of crafting wood textures in Photoshop.
Step-by-Step Guide to Creating Wood Textures in Photoshop
Prepare your canvas – Start by creating a new document in Photoshop with the desired dimensions and resolution for your wood texture. Consider the purpose of your texture and the final output to determine the appropriate size.
Choose your base color – Select a base color that represents the type of wood you want to recreate. For example, if you’re aiming for a light oak texture, choose a light brown color. Use the Paint Bucket tool to fill your canvas with the chosen color.
Add wood grain patterns – Create a new layer and select the Brush tool. Choose a brush with a textured tip or find a suitable wood grain brush online. Set the brush opacity to around 20-30% for a subtle effect. Start painting random lines and strokes on your canvas to simulate wood grain patterns. Vary the brush size and pressure to create natural variations.
Enhance the wood grain – To add depth and realism to your wood texture, create a new layer and select the Burn tool. Set the range to Shadows and adjust the exposure to a low value. Use the Burn tool to darken certain areas of the wood grain, giving it a more dimensional and weathered look.
Introduce color variations – Wood textures often have subtle color variations. Create a new layer and select the Brush tool. Choose a slightly darker or lighter shade of your base color and paint over certain areas of the wood grain to add variation. Use a low opacity and build up the color gradually for a natural effect.
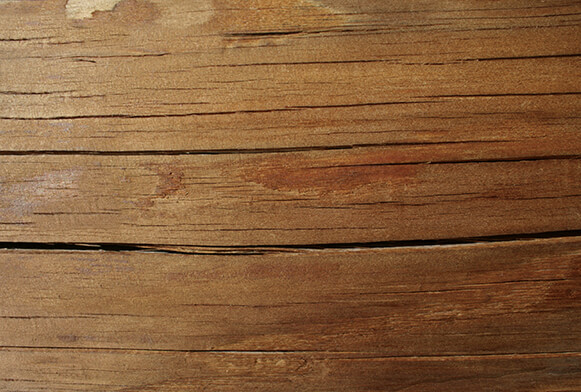
Apply texture overlays – To further enhance the realism of your wood texture, consider adding texture overlays. Find high-resolution wood texture images online and import them into Photoshop. Change the blending mode of the texture layer to Overlay or Soft Light and adjust the opacity as needed. This will blend the texture with your existing wood grain patterns, creating a more intricate and detailed texture.
Adding Depth and Realism to Wood Textures
Creating authentic wood textures involves more than just painting lines and adding colors. To make your wood textures truly lifelike, it’s essential to incorporate depth and realism.
Utilize shading and lighting techniques – Shadows and highlights play a crucial role in conveying depth and dimension in wood textures. Use the Dodge and Burn tools to selectively lighten or darken areas of your texture, emphasizing the contours and natural variations of the wood grain. Pay attention to the direction of light to ensure consistency throughout your texture.
Add knots and imperfections – Wood is rarely flawless, so adding knots, cracks, and other imperfections can make your texture more realistic. Create a new layer and use a small, textured brush to paint knots and irregularities onto your wood texture. Vary the size and shape of the knots to avoid repetition.
Consider the wood’s age and condition – Different types of wood age and weather differently. Take into account the age and condition of the wood you’re trying to recreate. For example, aged wood may have more pronounced cracks and weathering, while freshly cut wood may appear smoother and have fewer imperfections.
Enhancing Wood Textures with Filters and Effects
Photoshop offers a wide range of filters and effects that can be applied to your wood textures to enhance their appearance and stylize them to match your artistic vision.
Apply a noise filter – Adding a subtle noise filter can introduce a grainy texture to your wood, mimicking the natural imperfections found in real wood. Go to Filter > Noise > Add Noise and adjust the settings until you achieve the desired effect. Experiment with the amount and distribution of noise to find the perfect balance.
Experiment with layer blending modes – Changing the blending mode of your wood texture layers can produce interesting effects. Try blending modes such as Multiply, Overlay, or Soft Light to add depth and richness to your wood textures. Adjust the opacity of the layers to control the intensity of the blending.
Add depth with a drop shadow – To make your wood textures pop, consider adding a subtle drop shadow. Create a new layer below your wood texture layer and apply a drop shadow effect. Adjust the opacity and distance of the shadow to create a realistic sense of depth.
Incorporating Wood Textures into Digital Art Projects
Now that you have mastered the art of creating wood textures in Photoshop, it’s time to explore how you can incorporate them into your digital art projects. Here are a few ideas to get you started:
Backgrounds – Use wood textures as backgrounds for websites, social media posts, or digital presentations. The warmth and natural feel of wood can create a welcoming and engaging environment for your viewers.
Texturing 3D models – If you work with 3D models or renderings, applying wood textures can add a realistic touch to your creations. Whether it’s a piece of furniture or an architectural visualization, the right wood texture can bring your models to life.
Digital paintings – Incorporate wood textures into your digital paintings to add depth and texture to your artwork. Consider using wood textures as a base for creating realistic landscapes, still life scenes, or even portraiture.
Conclusion and Final Tips for Creating Stunning Wood Textures
Creating exquisite wood textures using Photoshop is a skill that can greatly enhance your digital artistry. By understanding the importance of texture, mastering the tools and techniques in Photoshop, and paying attention to details such as shading, lighting, and imperfections, you can create wood textures that are visually stunning and realistic.
With practice and dedication, you will be able to create wood textures that not only enhance your digital art but also captivate your audience. Embrace the beauty and warmth of wood textures and let your creativity shine through.
If you are looking for photo editing services then contact misterclippingpaths because they are best photo editing service providers in the market. They have a team of skilled professionals who can help you bring your creative visions to life. Whether you need help with basic photo edits or complex digital art creations, they’ve got you covered.
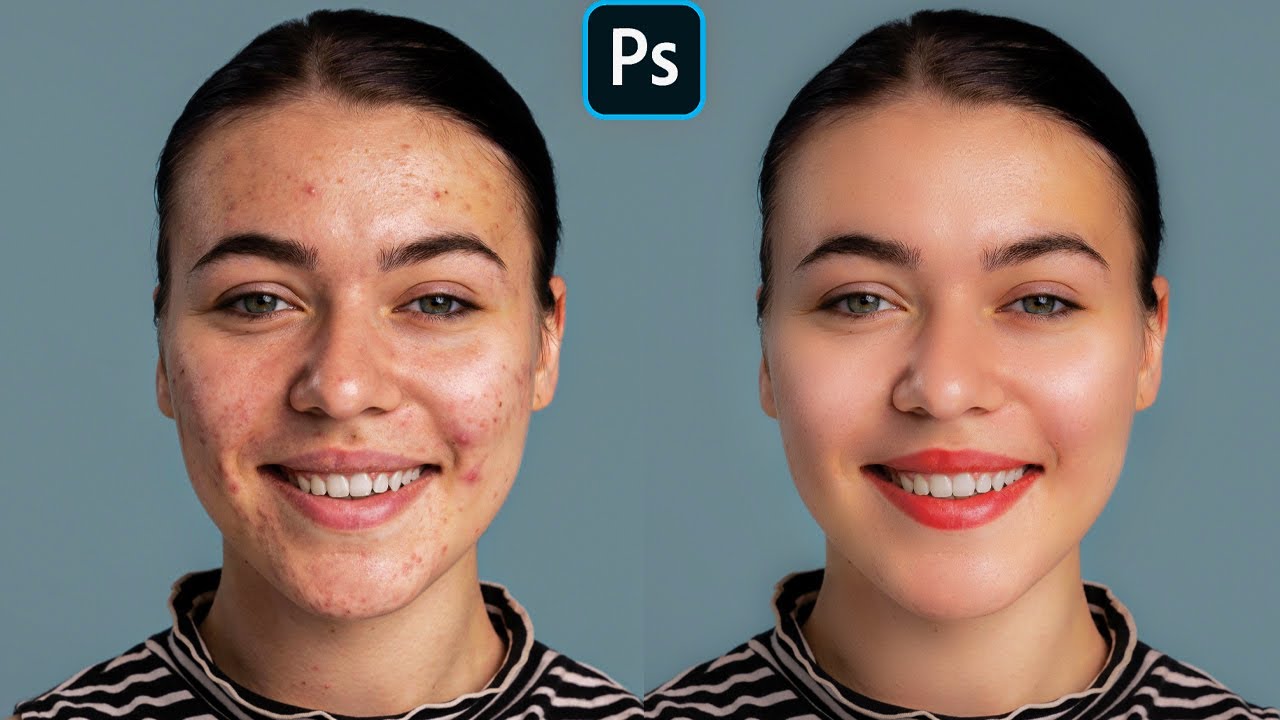
https://www.misterclippingpaths.com/wp-content/uploads/2022/08/mister_clipping_paths-300x99.png00writeron renthttps://www.misterclippingpaths.com/wp-content/uploads/2022/08/mister_clipping_paths-300x99.pngwriteron rent2024-01-23 07:13:292024-01-23 07:13:29How to Create Wood Textures Using Photoshop 2024
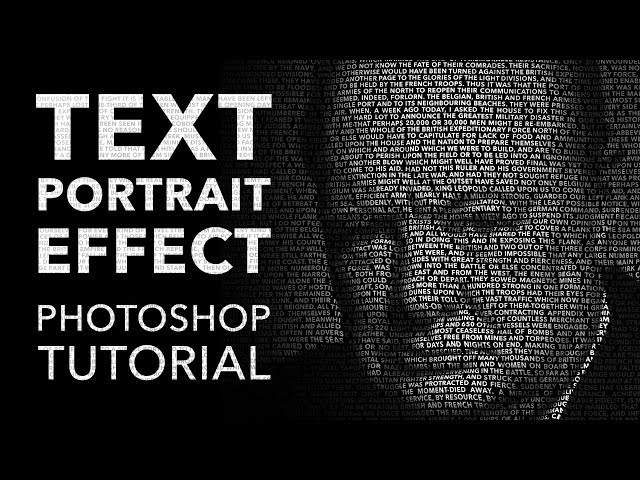
Photoshop has been a transformative tool in the digital art and design world, offering a plethora of creative options to artists, designers, photographers, and hobbyists. Among the many techniques it offers, one stands out for its uniqueness and potential to create visually striking images: the text portrait effect in Photoshop. This method merges typography and photography, creating a compelling visual interplay between text and image.
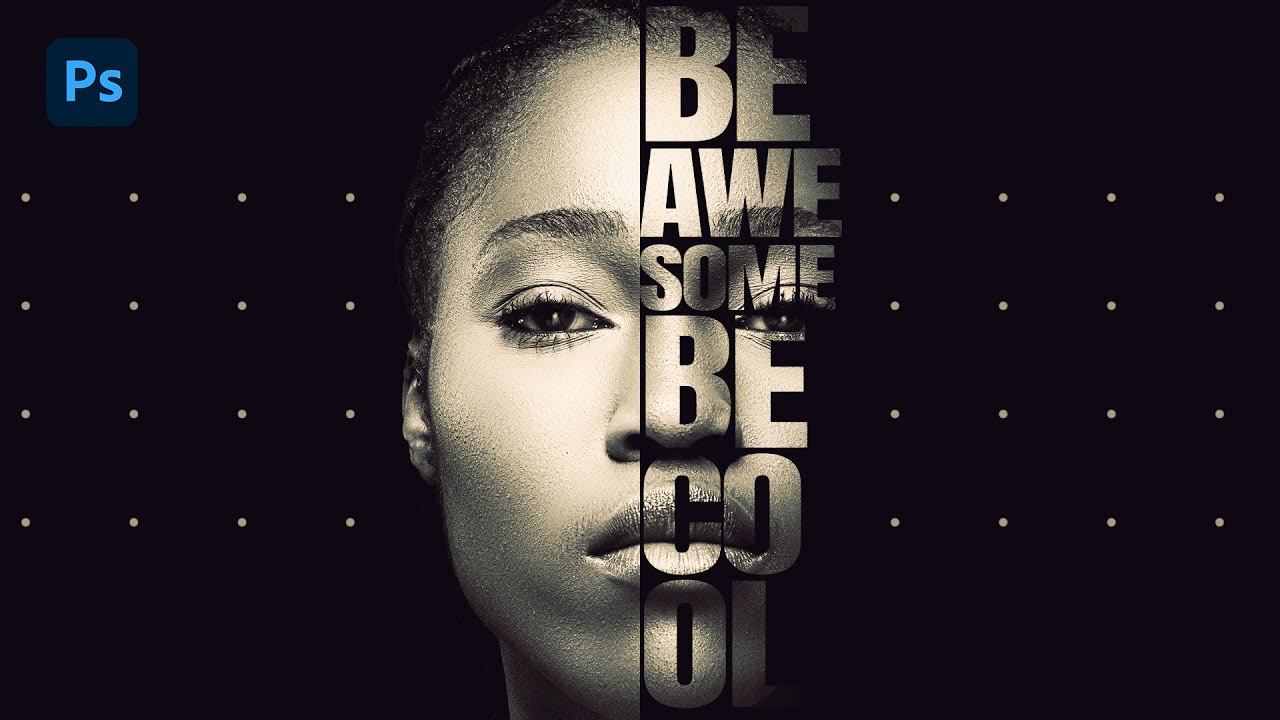
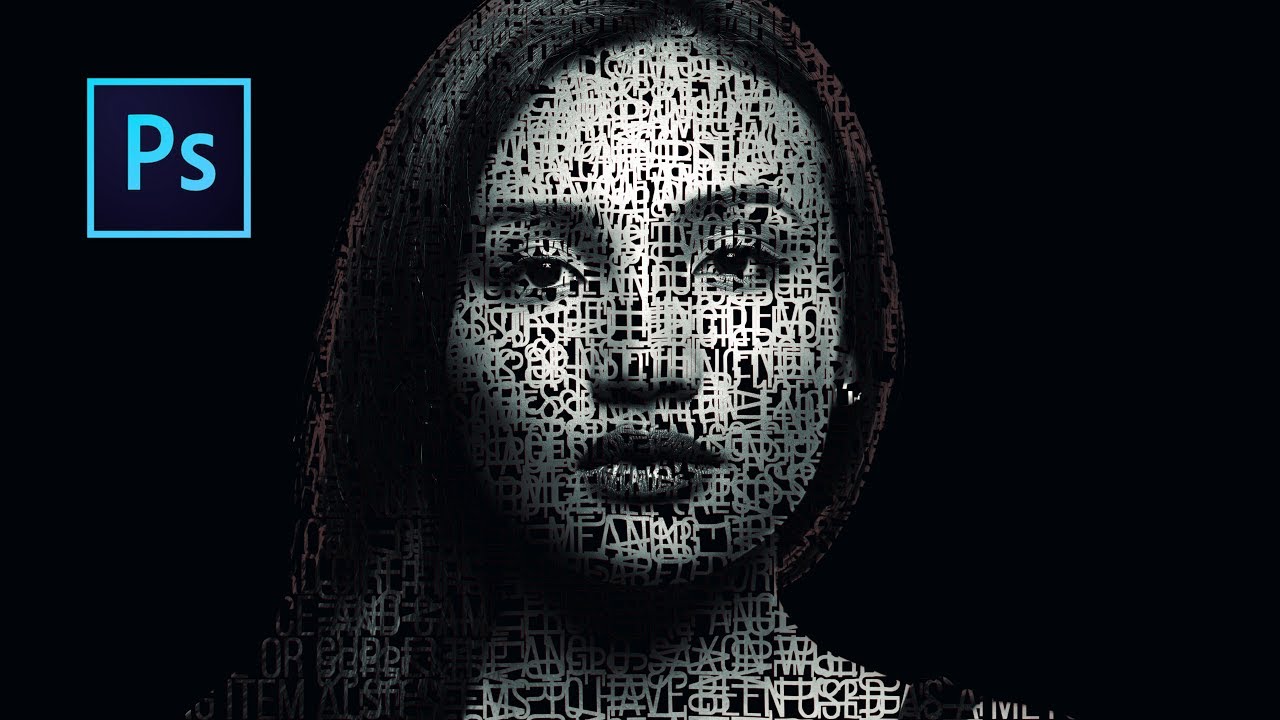
The text portrait effect in Photoshop is a creative technique where an image or portrait is made up of text. This text can be a single word, several words, or even a whole paragraph of text. The beauty of this technique is that it allows for a unique interplay between the visual and the textual. The image tells a story, and the text adds to that story, creating a layered, nuanced piece of art.
The text portrait effect in Photoshop is not just a cool effect; it’s a powerful design tool. It allows designers to convey complex ideas in a visually appealing and thought-provoking way. It’s a technique that pushes the boundaries of what’s possible in digital art, and it’s a testament to the power of Photoshop as a tool for creative expression.
Importance of Creativity in Photoshop
Creativity is a crucial aspect of Photoshop. It’s what separates the mundane from the magical, the ordinary from the extraordinary. Photoshop is not just a tool; it’s a canvas for creative expression, a platform where ideas can come to life. With Photoshop, you’re only limited by your imagination. The more creative you are, the more you can do with this powerful software.
Creativity in Photoshop is about more than just coming up with unique designs. It’s about problem-solving, thinking outside the box, and finding new ways to achieve your goals. It’s about pushing boundaries and challenging conventions. It’s about creating something that’s not just visually appealing, but also meaningful and impactful.
Creativity in Photoshop is also about experimentation. It’s about trying new techniques, playing with different tools, and seeing what works and what doesn’t. It’s about learning and growing as a designer or artist. The text portrait effect in Photoshop is a perfect example of this. It’s a technique that requires creativity, experimentation, and a keen eye for detail.
Step-by-step guide on creating text portrait effect in Photoshop
Creating a text portrait effect in Photoshop might seem daunting at first, especially if you’re new to the software. But don’t worry, with a bit of patience and practice, you’ll be able to create stunning text portraits in no time. Here’s a step-by-step guide to get you started.
First, open the image you want to use in Photoshop. Then, create a new layer and fill it with white. This will be your background layer. Next, select the Text tool and start typing your text. You can use any font you like, but make sure it’s bold and large enough to cover your image.
Once you’ve filled your image with text, it’s time to blend it with the image. To do this, you’ll need to create a clipping mask. Go to the Layers panel, right-click on your text layer, and select ‘Create Clipping Mask’. This will make your text take the shape of your image.
Now, it’s time to play with the blending modes. Go to the Layers panel, click on the drop-down menu next to ‘Blend Mode’, and start experimenting with different modes. The key here is to find a blend mode that allows your text to blend seamlessly with your image, creating a text portrait effect.
Tips to enhance your text portrait effect
Creating a text portrait effect in Photoshop is an art in itself, and like any art, it can be enhanced with a few tips and tricks.
One tip is to play with the opacity of your text layer. By lowering the opacity, you can create a more subtle, nuanced text portrait effect. This can add depth and complexity to your image, making it more visually appealing.
Another tip is to experiment with different fonts and font sizes. Different fonts can convey different moods and feelings, and by playing with different font sizes, you can create a sense of depth and perspective in your image.
Lastly, don’t forget about color. Even though you’re working with text, color can still play a significant role in your image. By using a color that complements your image, you can enhance the visual impact of your text portrait effect.
Common mistakes to avoid when creating text portrait effect
While creating a text portrait effect in Photoshop can be a fun and rewarding process, it’s also easy to make mistakes. Here are some common ones to watch out for.
One common mistake is using too much text. While it’s true that the text portrait effect relies on text, you don’t want to overdo it. If your image is too cluttered with text, it can detract from the visual impact of your portrait.
Another mistake is not paying attention to the readability of your text. If your text is too small, too faint, or in a font that’s hard to read, it can undermine the effectiveness of your text portrait effect. Remember, your text is not just a design element; it’s also a form of communication.
Lastly, don’t forget about the importance of composition. Even though you’re working with text, the rules of composition still apply. Make sure your text flows naturally with the shape and contours of your image, and avoid awkward or unnatural placements.
Conclusion
The text portrait effect in Photoshop is a powerful technique that can add a unique and creative touch to your images. It’s a technique that requires creativity, experimentation, and attention to detail. While it can be challenging at first, with practice and patience, you can master this technique and create stunning text portraits that captivate and inspire.
Remember, Photoshop is a tool for creative expression. The more you experiment with it, the more you’ll discover what it’s capable of. So don’t be afraid to push boundaries, try new things, and unleash your creativity.
And if you are looking for photo editing services then must visit misterclippingpaths. They are the best service providers in the market. Their team of professional photo editors can help you create stunning text portraits that stand out from the crowd. So why wait? Unleash your creativity with Photoshop and misterclippingpaths today!
https://www.misterclippingpaths.com/wp-content/uploads/2022/08/mister_clipping_paths-300x99.png00writeron renthttps://www.misterclippingpaths.com/wp-content/uploads/2022/08/mister_clipping_paths-300x99.pngwriteron rent2024-01-19 08:49:452024-01-19 08:52:39How to Create a Text Portrait Effect in Photoshop
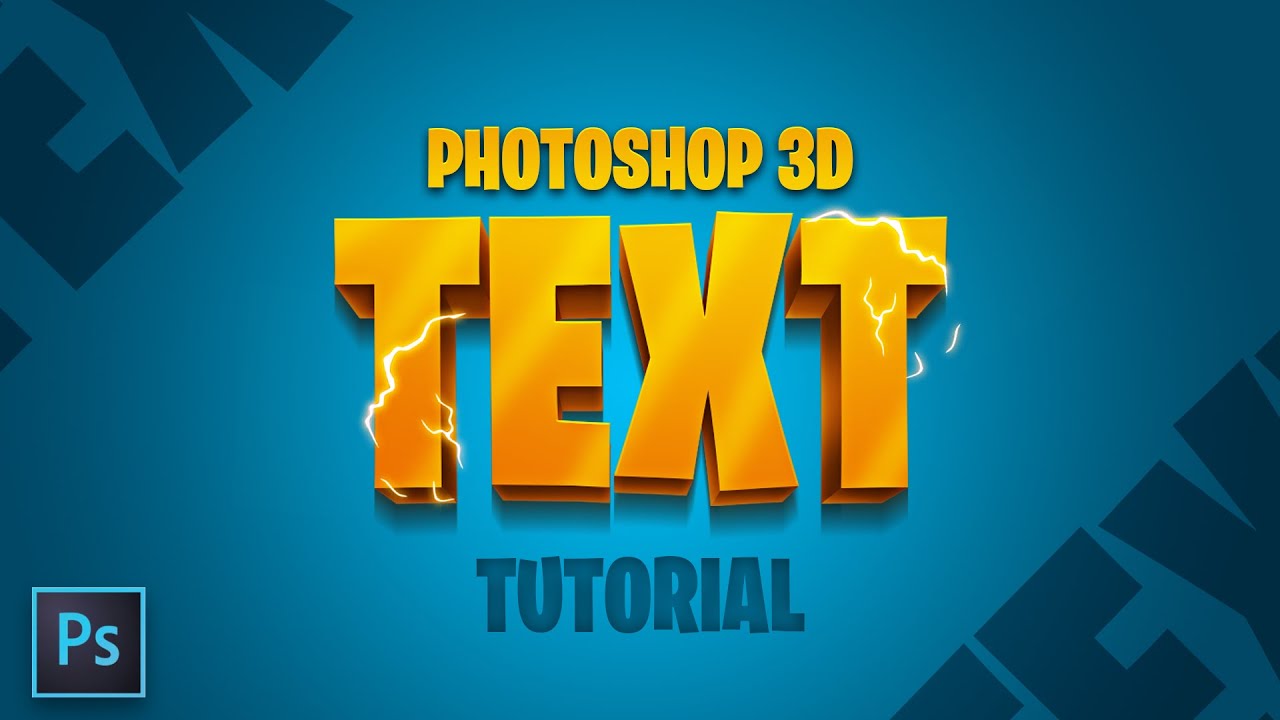
Welcome to the world of 3D Text Effect in Photoshop – a world where text leaps off the page and draws your attention like never before. This fantastic feature of Photoshop allows designers to transform ordinary 2D text into vibrant 3D masterpieces. Imagine being able to make your text not only stand out but also interact with your design in a more dynamic way. This is what 3D Text Effect in Photoshop is all about.
Creating 3D Text Effect in Photoshop is a skill that can take your graphic designs to the next level. It’s a tool that can be used in a wide range of design projects, from posters and logos to banners and websites. The 3D text effect brings an added depth to your designs, making them more engaging and visually appealing.
As you embark on this journey of mastering 3D Text Effect in Photoshop, you’ll discover that it’s not as complicated as it may seem. With a bit of practice and the right guidance, you’ll be creating stunning 3D text in no time.
Importance of Mastering the 3D Text Effect in Photoshop
Mastering the 3D Text Effect in Photoshop is essential for any graphic designer or digital artist. It’s a skill that not only makes your designs stand out but also gives you an edge in the competitive world of design.
In today’s digital age, where visuals are king, having the ability to create stunning 3D text is a powerful tool. It allows you to communicate your message more effectively, catch your audience’s attention, and create a lasting impression.
Furthermore, mastering the 3D Text Effect in Photoshop can open up new opportunities for you as a designer. It can help you land more projects, expand your portfolio, and even increase your earning potential.
Step-by-Step Guide to Creating a Basic 3D Text Effect
Now that you understand the importance of mastering the 3D Text Effect in Photoshop, it’s time to get started. Here’s a step-by-step guide to help you create your first basic 3D text effect.
First things first, create a new document in Photoshop. Select the Text Tool from the toolbar and type your text. Choose a bold, thick font for better results.
Next, go to the Layers panel and right-click on the text layer. Select ‘New 3D Extrusion from Selected Layer.’ This will turn your 2D text into a basic 3D model. You can adjust the Extrusion Depth in the Properties panel to give your text more depth.
Finally, rotate and position your 3D text using the 3D tools in the Options bar. You can also adjust the lighting and shadow settings in the 3D panel to make your text look more realistic.
Enhancing Your 3D Text Effect with Lighting and Shadows
Lighting and shadows play a crucial role in creating a realistic and compelling 3D Text Effect in Photoshop. They can add depth, contrast, and dimension to your text, making it pop off the page.
In the 3D panel, you can add a new light source by clicking on the ‘Add New Light to Scene’ button. You can adjust the brightness, color, and positioning of the light source to create different lighting effects.
Shadows can be adjusted in the 3D panel as well. You can change the shadow softness, darkness, and distance to create more depth and realism.
Remember, the key to mastering lighting and shadows is experimentation. Don’t be afraid to play around with different settings and see what works best for your design.
Adding Texture and Color to Your 3D Text Effect
Adding texture and color to your 3D text can give it more character and visual appeal. This step is where you can really let your creativity shine.
In the Properties panel, you can add texture to your 3D text by selecting the ‘Diffuse’ option and uploading a texture file. You can also adjust the scale, contrast, and brightness of the texture to achieve the desired effect.
For color, simply select the ‘Color’ option in the Properties panel and choose a color that suits your design. You can also use gradients to create a more dynamic color effect.
Advanced Techniques for 3D Text Effect in Photoshop
Once you’ve mastered the basics, you can start experimenting with more advanced techniques for 3D Text Effect in Photoshop.
One such technique is using the ‘Bevel and Emboss’ feature in the Layer Style panel. This allows you to create a more detailed and sculpted look for your 3D text.
Another advanced technique is using the ‘Displace’ filter. This can give your 3D text a distorted or warped effect, which can be really eye-catching.
These advanced techniques can take your 3D Text Effect in Photoshop to the next level, so don’t be afraid to push the boundaries and try something new.
Conclusion and Recap on Mastering 3D Text Effect in Photoshop
Mastering the 3D Text Effect in Photoshop is a journey of exploration and creativity. It’s a skill that can greatly enhance your designs and set you apart as a designer.
Remember, the key to mastering this skill is practice and experimentation. Don’t be afraid to try different techniques, play around with various settings, and let your creativity flow.
Hopefully, this guide has given you a good starting point on your journey to mastering 3D Text Effect in Photoshop. Keep practicing, keep learning, and before you know it, you’ll be creating stunning 3D text like a pro.
If you are looking for photo editing services, then you must visit misterclippingpaths.com. They are the best service providers in the market. They can help you with all your photo editing needs and give your designs the professional touch they deserve.
https://www.misterclippingpaths.com/wp-content/uploads/2022/08/mister_clipping_paths-300x99.png00writeron renthttps://www.misterclippingpaths.com/wp-content/uploads/2022/08/mister_clipping_paths-300x99.pngwriteron rent2024-01-19 08:32:262024-01-19 08:32:26How to Make Simple 3D Text Effect in Photoshop 2024
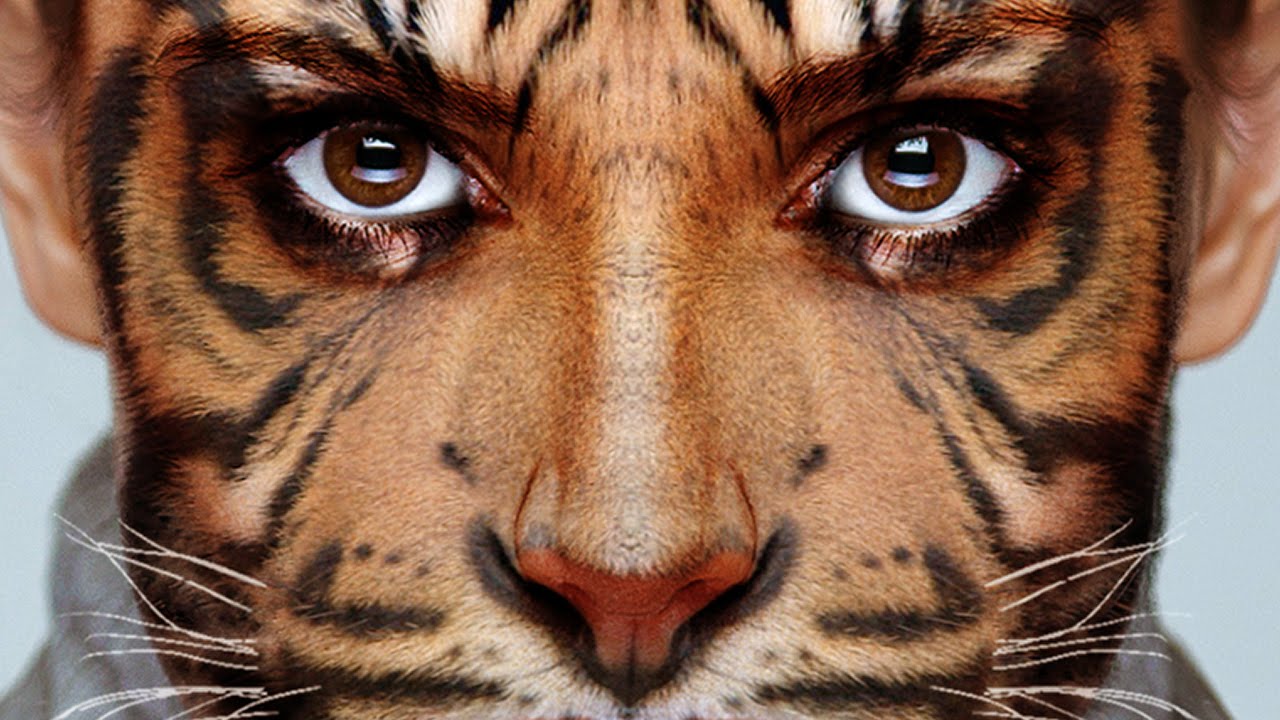
When it comes to digital art, Adobe Photoshop is an industry standard. Its wide array of tools and features allows creatives to produce everything from simple edits to complex, surreal artworks. One such genre of digital art that has been gaining traction is the creation of Animal Human Hybrids using Photoshop. This unique blend of reality and imagination introduces a new perspective to character design and portraiture. However, mastering this art requires not just creativity, but also a deep understanding of the software’s capabilities.
Over the years, Photoshop has evolved to become more user-friendly, with countless tutorials available online for different skill levels. Yet, for an aspiring digital artist, the myriad of tools and settings can be overwhelming. It’s not just about knowing which button to click, but also understanding how to use these tools in tandem to achieve the desired result. Learning Photoshop is akin to learning a new language. It takes time, practice, and patience.
The fusion of digital art and photography through Photoshop opens up a world of possibilities. It allows artists to break free from the constraints of traditional art and create pieces that push the boundaries of creativity. The creation of Photoshop Animal Human Hybrids is a testament to this. It blends the real and the imagined, creating a piece of art that is both striking and thought-provoking.
Importance of Mastering Photoshop for Creating Animal Human Hybrids
Creating a Photoshop Animal Human Hybrid requires mastery over the software. It involves detailed work, manipulating and blending multiple photos seamlessly to create a single, cohesive image. Whether you are a professional artist or a hobbyist, mastering the art of creating Animal Human Hybrids can significantly enhance your digital art skills.
The process of creating a Photoshop Animal Human Hybrid involves a deep understanding of the software’s features, from selection tools to layer masks, blending modes to adjustment layers. It also requires an understanding of lighting, shadows, and textures – elements that bring depth and realism to your creation. By learning how to create Animal Human Hybrids, you are effectively honing your skills in these critical areas.
Moreover, creating Animal Human Hybrids is not just about the technical aspects of Photoshop. It also involves creativity and imagination. It’s about envisioning a character that does not exist in the real world and bringing it to life through digital art. This ability to create something from nothing is a valuable skill that can be applied in many areas, from professional design work to personal projects.
Steps to Create an Animal Human Hybrid using Photoshop
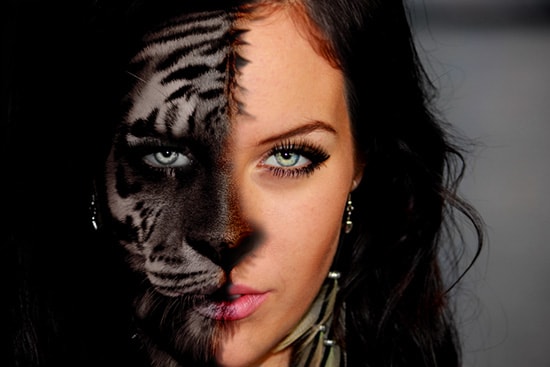
Creating a Photoshop Animal Human Hybrid can be challenging, but with the right steps, it becomes an exciting journey of creativity and learning. The first step is to gather your resources. You’ll need high-resolution images of the human face and animal features you want to incorporate. It’s essential to consider the lighting and angle of these photos to ensure a natural blend.
The next step is to use Photoshop’s selection tools to isolate the parts of the animal image you wish to incorporate into the human image. This could be anything from the eyes, nose, or mouth to the texture of the skin or fur. Using layer masks, you can seamlessly blend these elements into the human image. Remember to pay attention to the direction of the light and the texture of the skin to make the hybrid look realistic.
The final step involves fine-tuning your creation. This includes adjusting the color and lighting to match the original human image, adding shadows for depth, and using Photoshop’s smudge tool to blend any harsh edges. It’s also advisable to zoom out frequently to check the overall look and feel of your creation and make necessary adjustments.
Detailed Face Morphing Tutorial for Human Animal Portrait Creation
Creating a successful Photoshop Animal Human Hybrid involves a detailed process of face morphing. This is a critical step in the process of Human Animal Portrait Creation, and it requires careful attention to detail and patience. Let’s dive into a step-by-step tutorial to understand this process better.
Firstly, open the human and animal images in Photoshop. Using the Quick Selection tool, select the animal features you want to morph into the human face. Once selected, copy these features onto a new layer on the human face.
Next, reduce the opacity of the copied layer to see the underlying human face. This will help you align the animal features accurately with the human face. Use the Transform tool to scale and rotate the features until they match the shape and size of the human face.
After aligning the features, increase the layer opacity back to 100%. Now comes the blending process. Using a soft brush on the layer mask, paint with black to blend the animal features into the human face. Remember to paint gently around the edges for a smooth blend.
Advanced Digital Art Fusion Techniques
Mastering the art of creating Photoshop Animal Human Hybrids involves learning advanced digital art fusion techniques. These techniques take your creations to the next level, adding depth and realism to your hybrids.
One such technique is Dodge and Burn. This technique is used to add contrast and depth to your image by lightening (dodging) and darkening (burning) specific areas. Another technique is Frequency Separation. This technique separates the color and texture layers of an image, allowing you to work on them separately. This is particularly useful when blending the skin texture of the animal with the human face.
Yet another technique is the use of Adjustment Layers. These layers allow you to apply changes such as color correction, brightness, contrast, and more without affecting the original image layers. This is particularly useful when you want to match the color and lighting of the animal features with the human face.
Conclusion: Mastering the Art of Photoshop Animal Human Hybrids
Mastering the art of Photoshop Animal Human Hybrids is a journey of creativity and learning. It allows you to push the boundaries of digital art, creating unique and compelling pieces. It involves mastering Photoshop’s tools and features, understanding the principles of lighting and texture, and employing advanced digital art fusion techniques.
The process may seem daunting at first, but with practice and patience, you will see your skills improve significantly. So, let your imagination run wild and start creating your own Photoshop Animal Human Hybrids.
And remember, the journey doesn’t stop here. Keep experimenting, keep learning, and keep pushing your creative boundaries. The world of digital art is vast and exciting, and there’s always something new to learn.
If you are looking for photo editing services then contact misterclippingpaths because they are best photo editing service providers in the market. They have a team of skilled professionals who can help you bring your creative visions to life. Whether you need help with basic photo edits or complex digital art creations, they’ve got you covered.
https://www.misterclippingpaths.com/wp-content/uploads/2022/08/mister_clipping_paths-300x99.png00writeron renthttps://www.misterclippingpaths.com/wp-content/uploads/2022/08/mister_clipping_paths-300x99.pngwriteron rent2024-01-19 07:55:512024-01-19 07:55:51A Step-by-Step Guide to Combine Animal and Human Face in Photoshop 2024
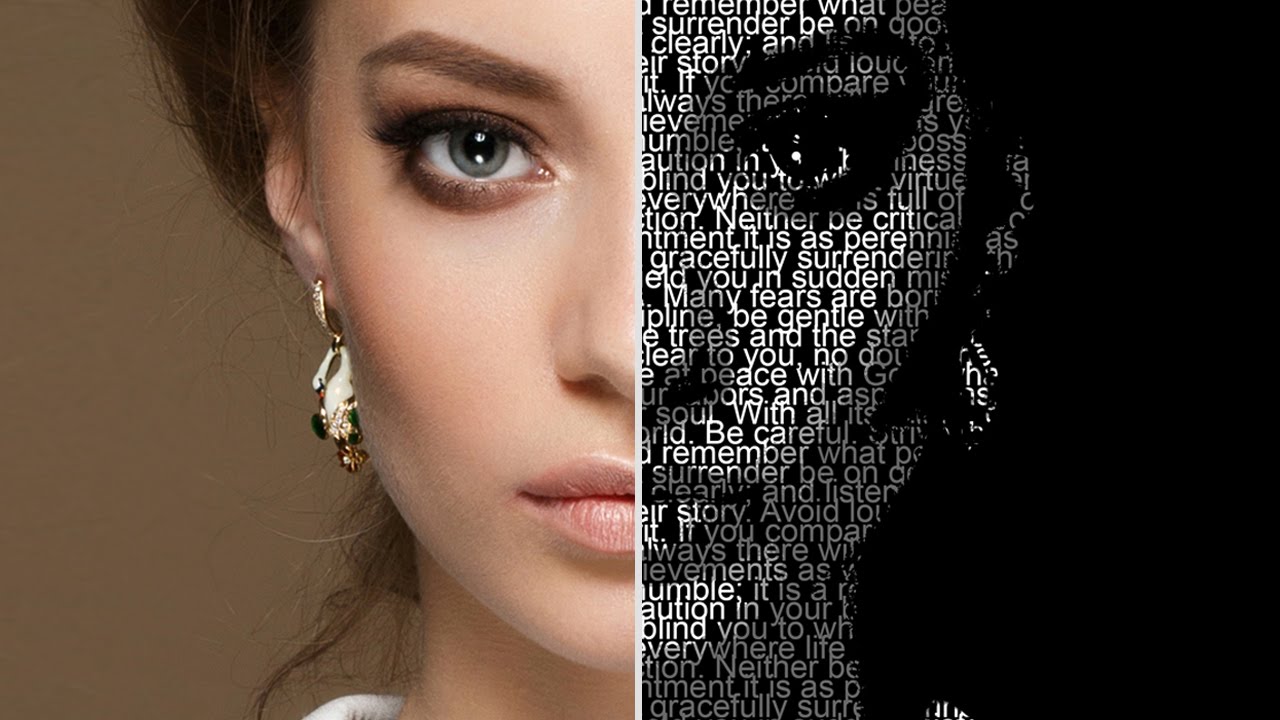
Digital artistry is an ever-evolving field, and one of its most fascinating branches is the combination of typography and photography to create Typography Portraits in Photoshop. This unique art form allows artists to weave narratives and evoke emotions in innovative manners. Whether you’re a Photoshop pro or a digital art novice, this tutorial will guide you through crafting a captivating typographic portrait.
1. Choosing the Right Image
Creating powerful Typography Portraits in Photoshop begins with selecting the right image. Consider the following aspects when selecting your image:
Contrast: The distinction between the subject’s face and the background is crucial for making the text stand out.
Details: The facial details contribute to the final composition’s personality and character.
Emotion: Opt for a portrait that captures a compelling emotion, adding depth to the artwork.
Background: A simple, distraction-free background allows the text to take center stage.
Lighting: Good lighting significantly shapes the overall aesthetic of the typography portrait.
2. Opening the Image in Photoshop
Once you’ve chosen your image, open it in Photoshop by right-clicking the image, selecting “Open with,” and then choosing Adobe Photoshop.
3. Selecting the Subject
To create a layer mask of the subject, you need to select the subject first. This can be done using various tools like the quick selection tool or the magnetic lasso tool. Alternatively, you can select the “Select” menu option and choose “Subject” from the dropdown menu.
4. Creating a Layer Mask for the Subject
Following the selection of your subject, head to the “Select” menu again and choose “Select and Mask.” Under the edge detection heading, check the box for Smart Radius and adjust the Radius to 1px.
Then, select Decontaminate Colors, move the Amount slider to 100%, and change Output To “New Layer.” This will create a new layer of your subject without a background.
5. Creating a Displacement Map
The next step involves creating a displacement map, which will help the text wrap around the contours of the face, giving the portrait a more realistic look.
To do this, duplicate the layer and save it as a .psd file on your desktop for later use.
6. Crafting a Word Cloud
Now comes the fun part! Scour the internet for interesting word clouds that align with your message or the emotions depicted in your image. Alternatively, you can customize your own word cloud using words that resonate with you. Remember to use white text on a black background for a better effect.
7. Overlaying the Text on Your Image
Open your word cloud in Photoshop and drag the text into the tab with your subject. This will add a text layer to your subject’s layers. Use the Transform Tool to adjust the size of your word cloud and make sure to cover the entire image with text.
8. Cropping the Image
To ensure the text aligns with the displacement map, you need to crop the image to fit. Go to the Image dropdown, select “Crop,” and deselect the text.
9. Implementing Displacement
Next, displace the text layer to make it conform to the shape and texture of the subject in the photo. You can do this non-destructively by turning the text layer into a smart object and applying the displacement map saved earlier.
10. Finishing Up
With the displacement done, it’s time to tweak the final layers for the perfect effect. Change the Blend Mode of the subject Layer to “Linear Burn,” adjust the Opacity of the top text layer to 15%, and remove parts of the top text layer that go over the subject’s face.
11. Admiring Your Masterpiece
Congratulations! You’ve successfully created a unique and stunning typographic portrait.
12. Conclusion
Creating Typography Portraits in Photoshop is a testament to the endless possibilities of digital artistry. It might seem challenging at first, but with practice and creativity, you can produce striking and individualistic text-based portraits.
Remember, if you’re looking for professional typography portrait services, visit misterclippingpaths. They are one of the best editing services providers in the market.
Do you have any questions or comments about creating Typography Portraits in Photoshop? Don’t hesitate to leave a comment below, and please share this tutorial if you found it useful!
https://www.misterclippingpaths.com/wp-content/uploads/2022/08/mister_clipping_paths-300x99.png00writeron renthttps://www.misterclippingpaths.com/wp-content/uploads/2022/08/mister_clipping_paths-300x99.pngwriteron rent2024-01-19 06:56:522024-01-19 06:58:06HOW TO CREATE A STUNNING TYPOGRAPHY PORTRAIT IN PHOTOSHOP 2024
As a professional photographer or graphic designer, you understand the importance of creating visually appealing images. One of the key elements that can make or break the quality of an image is the presence of realistic shadows. Shadows add depth, dimension, and realism to photographs, making them more captivating and engaging to the viewer. In the digital era, photo shadow creation services have emerged as a valuable tool for enhancing the quality of images. These services utilize advanced techniques to create and enhance shadows, transforming ordinary images into extraordinary works of art.
Why Realistic Shadows are Important in Images
Realistic shadows play a crucial role in creating a sense of realism and depth in images. They help to anchor objects to their surroundings and give them a three-dimensional appearance. When shadows are absent or poorly executed, images can appear flat and lifeless. On the other hand, well-executed shadows can make objects appear more tangible, adding a sense of depth and dimension. This can significantly enhance the overall aesthetic appeal and impact of an image.
In addition to improving the visual appeal, realistic shadows also contribute to the storytelling aspect of a photograph. Shadows can convey emotions, create a specific mood, or highlight certain elements within an image. For example, a soft, diffused shadow can evoke a sense of calm and tranquility, while a harsh, dramatic shadow can create a sense of tension or mystery. By manipulating shadows, photographers and graphic designers have the power to influence the narrative of an image and guide the viewer’s focus and interpretation.
Different Types of Shadows Used in Photo Editing
Photo shadow creation services employ various techniques to create different types of shadows, depending on the desired effect and context. Some of the commonly used shadow types include:
Natural Shadows: Natural shadows mimic the way light falls on objects in the real world. They are created using light and shadow manipulation techniques to make objects appear grounded and realistic.
Drop Shadows: Drop shadows are commonly used in graphic design to create the illusion of depth and lift objects off the background. They are typically soft and subtle, adding a sense of dimension to two-dimensional elements.
Reflection Shadows: Reflection shadows simulate the effect of a reflective surface, such as a mirror or glass. They add a touch of sophistication and elegance to product images, making them appear more polished and professional.
Cast Shadows: Cast shadows are created when an object blocks the path of light, resulting in a shadow being cast on a surface. These shadows can be used to create a sense of drama, highlight specific areas, or direct the viewer’s attention.
By understanding the different types of shadows and their applications, photo shadow creation services are able to tailor their techniques to achieve the desired visual effect and enhance the overall quality of an image.
How Photo Shadow Creation Services Enhance Images
Photo shadow creation services utilize advanced software and techniques to create and enhance shadows in images. These services employ skilled professionals who understand the intricacies of light and shadow, ensuring that the shadows created are realistic and visually appealing.
The process typically involves isolating the object or subject from its background, creating a separate layer for the shadow, and then applying various techniques to manipulate the shadow’s size, shape, opacity, and direction. This meticulous attention to detail ensures that the shadow seamlessly integrates with the image, enhancing its overall visual impact.
In addition to creating shadows from scratch, photo shadow creation services also specialize in enhancing existing shadows. By refining and fine-tuning the shadows present in an image, these services can correct any imperfections or inconsistencies, resulting in a more polished and professional final product.
Conclusion: The Impact of Realistic Shadows on Image Quality
In the world of photography and graphic design, attention to detail is paramount. Realistic shadows are a vital component of creating high-quality, visually stunning images. They add depth, dimension, and realism, enhancing the overall aesthetic appeal and impact of an image.
Photo shadow creation services have revolutionized the way images are edited and enhanced. These services employ advanced techniques to create different types of shadows, tailored to the specific needs and context of the image. By utilizing these services, photographers and graphic designers can elevate the quality of their work, creating captivating and impactful visuals.
So, if you are looking to enhance your images with realistic shadows, consider using MisterClippingPaths. Their photo shadow creation services will transform your ordinary images into extraordinary works of art. Don’t settle for flat and lifeless images; let shadows breathe life into your visuals.
In today’s visual-driven world, stunning visuals play a crucial role in capturing the attention of viewers. Whether it’s for professional photography, advertising, or personal projects, the quality of the visuals can make or break the impact of the final product. One technique that has revolutionized the way photos are edited is HDR, or High Dynamic Range, photo editing. HDR photo editing services have emerged as a game-changer, offering a range of benefits that enhance the visual appeal of images.
HDR photo editing involves merging multiple exposures of a single photograph to create an image that showcases the full range of tones and colors. This technique allows for greater detail in both the highlights and shadows of an image, resulting in a more balanced and vibrant picture. By combining the best elements from each exposure, HDR photo editing creates a final image that is closer to what the human eye sees, making it more visually striking and realistic.
Benefits of using HDR photo editing services
Improved Dynamic Range: The primary advantage of HDR photo editing services is the ability to capture a wider range of tones and colors in an image. This means that even in challenging lighting conditions, such as high contrast scenes or low-light environments, the details in both the highlights and shadows can be preserved. The resulting images have a more balanced exposure and a greater sense of depth.
Enhanced Details and Textures: HDR photo editing services excel at bringing out intricate details and textures that might otherwise be lost in a regular photograph. By merging multiple exposures, these services can reveal the fine nuances of textures, such as the grain in wood or the intricacies of fabric. This level of detail adds a new level of realism and depth to the final image, making it visually captivating.
Vibrant and Natural Colors: HDR photo editing services are capable of producing images with stunning, true-to-life colors. By capturing a wider range of tones, these services ensure that colors are accurately represented, resulting in vibrant and natural-looking images. This is particularly beneficial for industries such as fashion, real estate, and product photography, where accurate color representation is essential.
How HDR photo editing works
HDR photo editing involves a multi-step process that combines multiple exposures of a single photograph. Here’s a breakdown of the key steps involved:
Capture Multiple Exposures: The first step in HDR photo editing is capturing multiple exposures of the same scene. This is typically done by adjusting the camera’s settings to capture images at different exposure levels. Typically, three exposures – one underexposed, one correctly exposed, and one overexposed – are captured to cover a wide range of tones.
Merge Exposures: Once the multiple exposures are captured, they are merged using specialized HDR software. This software aligns and combines the different exposures, allowing for the selection of the best elements from each image. The result is a single image that showcases the full range of tones and details.
Tone Mapping: After the exposures are merged, the next step is tone mapping. Tone mapping is a technique used to adjust the contrast, brightness, and saturation of the image to achieve the desired look. This step is essential in creating a visually appealing image that strikes the right balance between highlights and shadows.
Final Touches: The final step in HDR photo editing involves making any necessary adjustments to the image to further enhance its overall appearance. This may include fine-tuning the color balance, removing any imperfections, or applying creative effects to achieve a specific aesthetic.
Common misconceptions about HDR photo editing
While HDR photo editing has gained popularity in recent years, there are still some misconceptions surrounding this technique. Let’s debunk a few common myths:
HDR means oversaturated and unrealistic images: One of the biggest misconceptions about HDR photo editing is that it results in oversaturated and unrealistic images. While it is true that HDR can produce vibrant colors, it is up to the editor’s discretion to strike the right balance. Skilled HDR photo editing services can ensure that the images look natural and visually stunning without crossing the line into unrealistic territory.
HDR is only suitable for landscapes: Another misconception is that HDR is only beneficial for landscape photography. While it is true that HDR is commonly used in landscape photography to capture the full range of tones in scenic views, it can be applied to various other genres as well. HDR photo editing can enhance architectural photography, product photography, and even portraits by bringing out the details in different lighting conditions.
HDR is a time-consuming process: HDR photo editing may seem like a time-consuming process, but with advancements in technology and the availability of HDR software, the process has become more efficient. Skilled HDR photo editing services have the expertise and tools to streamline the process, ensuring quick turnaround times without compromising on the quality of the final images.
Conclusion: Embracing the power of HDR photo editing for stunning visuals
HDR photo editing services have revolutionized the world of photography and visual content creation. The ability to capture a wider range of tones, enhance details and textures, and create vibrant and natural-looking images has made HDR a game-changer for stunning visuals. While there may be misconceptions surrounding HDR photo editing, the benefits it offers are undeniable.
To take advantage of HDR photo editing services and elevate your visuals to the next level, consider using misterclipping paths. With their expertise in HDR editing and commitment to delivering high-quality results, they can help you create visually striking images that leave a lasting impression on your audience.
So, why settle for ordinary when you can embrace the power of HDR photo editing and transform your visuals into extraordinary works of art? Take the leap and unlock the full potential of your photographs with HDR photo editing services today.
https://www.misterclippingpaths.com/wp-content/uploads/2022/08/mister_clipping_paths-300x99.png00writeron renthttps://www.misterclippingpaths.com/wp-content/uploads/2022/08/mister_clipping_paths-300x99.pngwriteron rent2023-12-23 14:39:572024-01-01 05:44:24Why HDR Photo Editing Services are a Game-changer for Stunning Visuals 2024
We may request cookies to be set on your device. We use cookies to let us know when you visit our websites, how you interact with us, to enrich your user experience, and to customize your relationship with our website.
Click on the different category headings to find out more. You can also change some of your preferences. Note that blocking some types of cookies may impact your experience on our websites and the services we are able to offer.
Essential Website Cookies
These cookies are strictly necessary to provide you with services available through our website and to use some of its features.
Because these cookies are strictly necessary to deliver the website, refusing them will have impact how our site functions. You always can block or delete cookies by changing your browser settings and force blocking all cookies on this website. But this will always prompt you to accept/refuse cookies when revisiting our site.
We fully respect if you want to refuse cookies but to avoid asking you again and again kindly allow us to store a cookie for that. You are free to opt out any time or opt in for other cookies to get a better experience. If you refuse cookies we will remove all set cookies in our domain.
We provide you with a list of stored cookies on your computer in our domain so you can check what we stored. Due to security reasons we are not able to show or modify cookies from other domains. You can check these in your browser security settings.
Other external services
We also use different external services like Google Webfonts, Google Maps, and external Video providers. Since these providers may collect personal data like your IP address we allow you to block them here. Please be aware that this might heavily reduce the functionality and appearance of our site. Changes will take effect once you reload the page.
Google Webfont Settings:
Google Map Settings:
Google reCaptcha Settings:
Vimeo and Youtube video embeds:
Privacy Policy
You can read about our cookies and privacy settings in detail on our Privacy Policy Page.