HOW TO CREATE A STUNNING TYPOGRAPHY PORTRAIT IN PHOTOSHOP 2026
Digital artistry is an ever-evolving field, and one of its most fascinating techniques is the combination of typography and photography to create stunning typography portraits in Photoshop. This unique art form allows words, letters, and creative typography to merge seamlessly with portrait photography, transforming ordinary images into expressive works of digital art. Whether you’re a beginner or an experienced Photoshop user, this tutorial will guide you through creating a professional typography portrait using modern Photoshop 2026 techniques.
Typography portraits remain a popular choice for creative posters, album covers, social media graphics, branding projects, and digital artwork. In Photoshop 2026, improved typography controls, Smart Objects, Layer Masks, and AI-assisted tools make the entire workflow more flexible while preserving complete creative control.
Throughout this tutorial, you’ll learn how to choose the right portrait, prepare your typography, create and apply displacement maps, blend text naturally with facial features, and refine the final composition for a realistic and visually striking result. By combining traditional typography techniques with Photoshop 2026’s modern editing workflow, you’ll be able to produce high-quality typography portraits suitable for both personal and commercial projects.
1. Choosing the Right Image
Creating a successful typography portrait begins with selecting the right image. The quality and composition of your portrait have a significant impact on the final result. Choosing a high-resolution photo with strong facial details makes it much easier to blend typography naturally into the subject.
When selecting your portrait, consider the following:
- High Resolution: Use a sharp, high-quality image to preserve facial details and ensure crisp typography.
- Good Contrast: Clear separation between the subject and the background makes masking and blending more effective.
- Balanced Lighting: Even lighting helps the typography blend naturally with the facial contours.
- Expressive Portrait: Portraits with strong facial features and expressions create more visually engaging typography artwork.
- Simple Background: A clean or blurred background allows the portrait to remain the primary focus and simplifies the editing process.
In Photoshop 2026, tools such as Select Subject, Object Selection, and improved Layer Masks make it easier than ever to isolate your subject accurately before applying typography effects. Spending a little extra time choosing the right source image will make every step of the creative process smoother and produce a far more professional final result.
2. Opening the Image in Photoshop
Once you’ve selected your portrait, open it in Adobe Photoshop 2026. For the best editing experience, start by reviewing the image in the Camera Raw Filter if any exposure, contrast, or color adjustments are needed. Making these corrections before creating the typography effect will help achieve a cleaner and more professional result.
After opening the image, duplicate the background layer or convert it into a Smart Object. This non-destructive workflow allows you to make edits, apply filters, and refine your typography portrait without permanently affecting the original image.
Organizing your layers from the beginning is also a good practice. Keeping your portrait, typography, masks, and adjustment layers separate will make the editing process more efficient as your project becomes more complex.
3. Selecting the Subject
Selecting the subject accurately is one of the most important steps in creating a realistic typography portrait. A clean selection ensures that the text blends naturally with the facial features while maintaining a professional appearance.
In Photoshop 2026, start by using Select Subject or the Object Selection Tool to automatically detect and isolate your portrait. These AI-powered tools can accurately identify facial details, hair, and edges, saving significant editing time compared to manual selections.
After making the initial selection, open the Select and Mask workspace to refine the edges. Adjust settings such as Smooth, Feather, Contrast, and Shift Edge to improve the selection, especially around hair and fine details. Use the Refine Edge Brush Tool where necessary to achieve clean and natural-looking edges.
Once you’re satisfied with the selection, click OK or Output to Layer Mask to continue with a non-destructive workflow. Taking the time to create a precise selection will make the typography effect blend much more seamlessly with the portrait.
4. Creating a Layer Mask for the Subject
After selecting your subject, the next step is to create a Layer Mask. Layer Masks are one of Photoshop’s most essential non-destructive editing tools, allowing you to hide or reveal parts of an image without permanently deleting any pixels.
With your selection active, click the Add Layer Mask button at the bottom of the Layers panel. Photoshop will automatically create a mask based on your selection, isolating the portrait from the background while keeping the original image fully editable.
If any areas need refinement, select the mask thumbnail and use a soft Brush Tool with black or white paint to hide or reveal portions of the image. This technique is especially useful for cleaning up edges around the hair, face, and shoulders while preparing the portrait for the typography effect.
In Photoshop 2026, Layer Masks work seamlessly with Smart Objects, Adjustment Layers, and Select and Mask, giving you complete flexibility to refine your composition at any stage without damaging the original image. A clean and accurate mask is the foundation of a realistic typography portrait.
5. Creating a Displacement Map
A Displacement Map is what makes the typography appear naturally wrapped around the contours of the face instead of looking like flat text placed on top of the image. It uses the portrait’s highlights, shadows, and textures to distort the typography, creating a realistic engraved or wrapped effect.
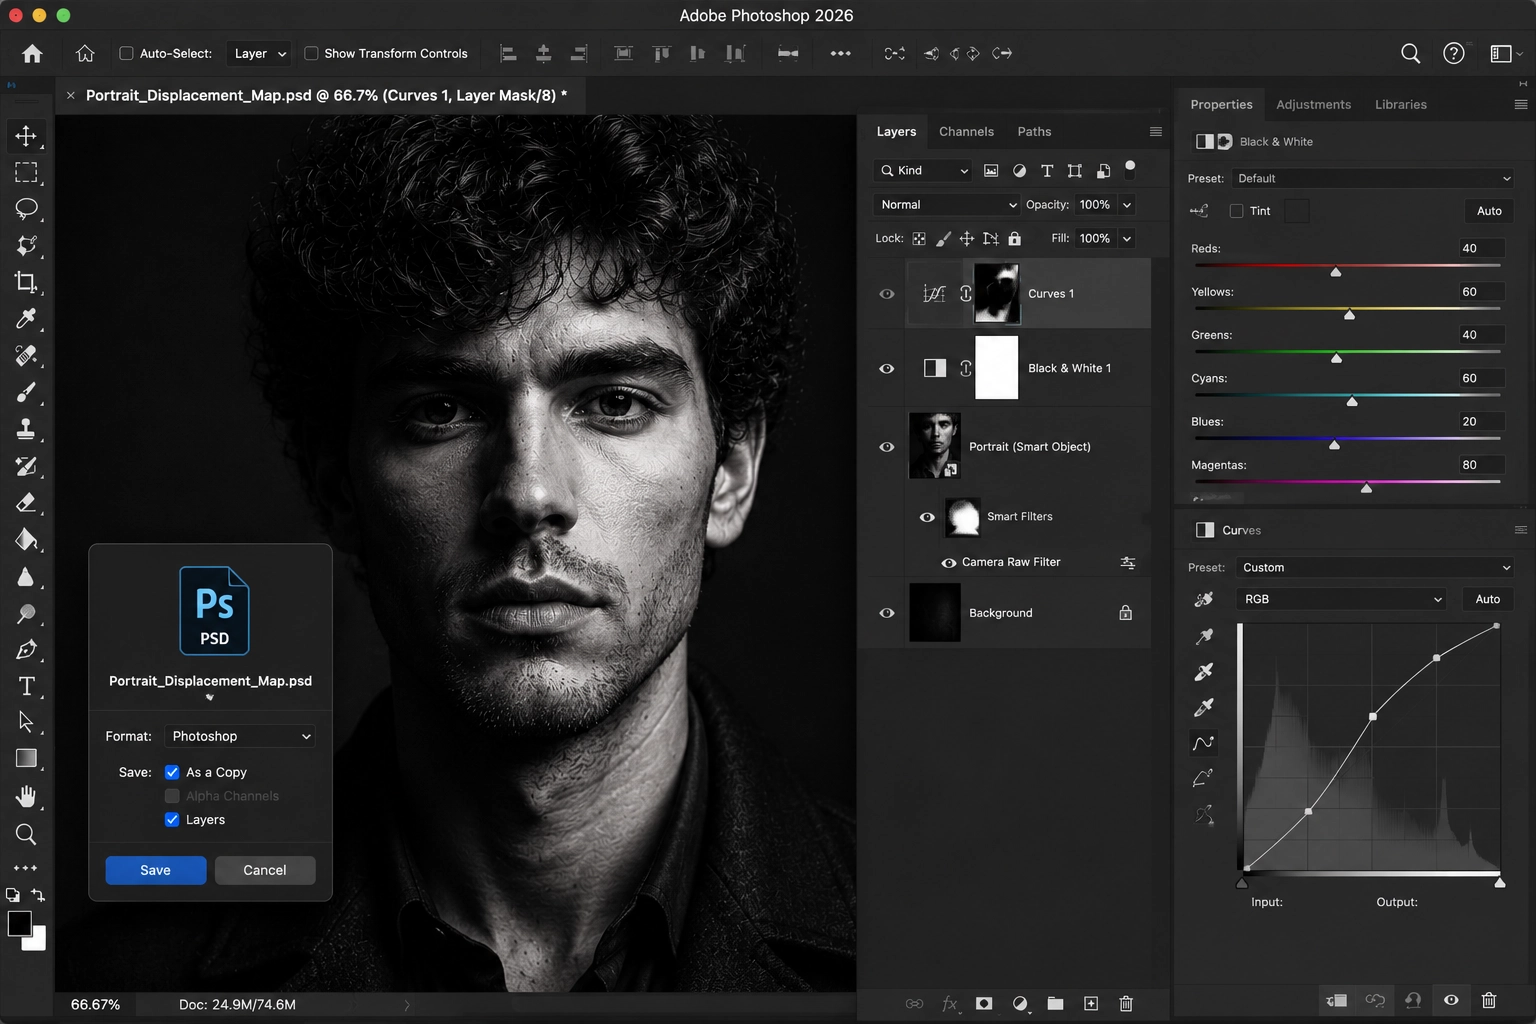
To create the displacement map, duplicate your portrait layer or create a merged copy of the visible layers (Ctrl/Cmd + Alt + Shift + E). Convert this layer into a Smart Object before making any adjustments to preserve a non-destructive workflow.
Next, remove unnecessary color information by applying a Black & White Adjustment Layer or desaturating the image. Increase the facial contrast using Levels or Curves so that important details such as the nose, eyes, lips, and skin texture become more defined. The stronger the contrast, the more accurately Photoshop can map the typography to the facial contours.
Once the image is prepared, save it as a separate PSD file (for example, Portrait_Displacement_Map.psd). This PSD file will later be used with Photoshop’s Displace Filter to automatically warp the typography so it follows the natural shape of the portrait.
A well-prepared displacement map is the key to achieving a convincing typography portrait, as it helps the text blend seamlessly with the subject’s facial structure while maintaining a realistic and professional appearance.
6. Applying the Typography
Now that your displacement map is ready, it’s time to apply the typography to your portrait. This is where your design begins to take shape, transforming a simple portrait into a creative typography artwork.
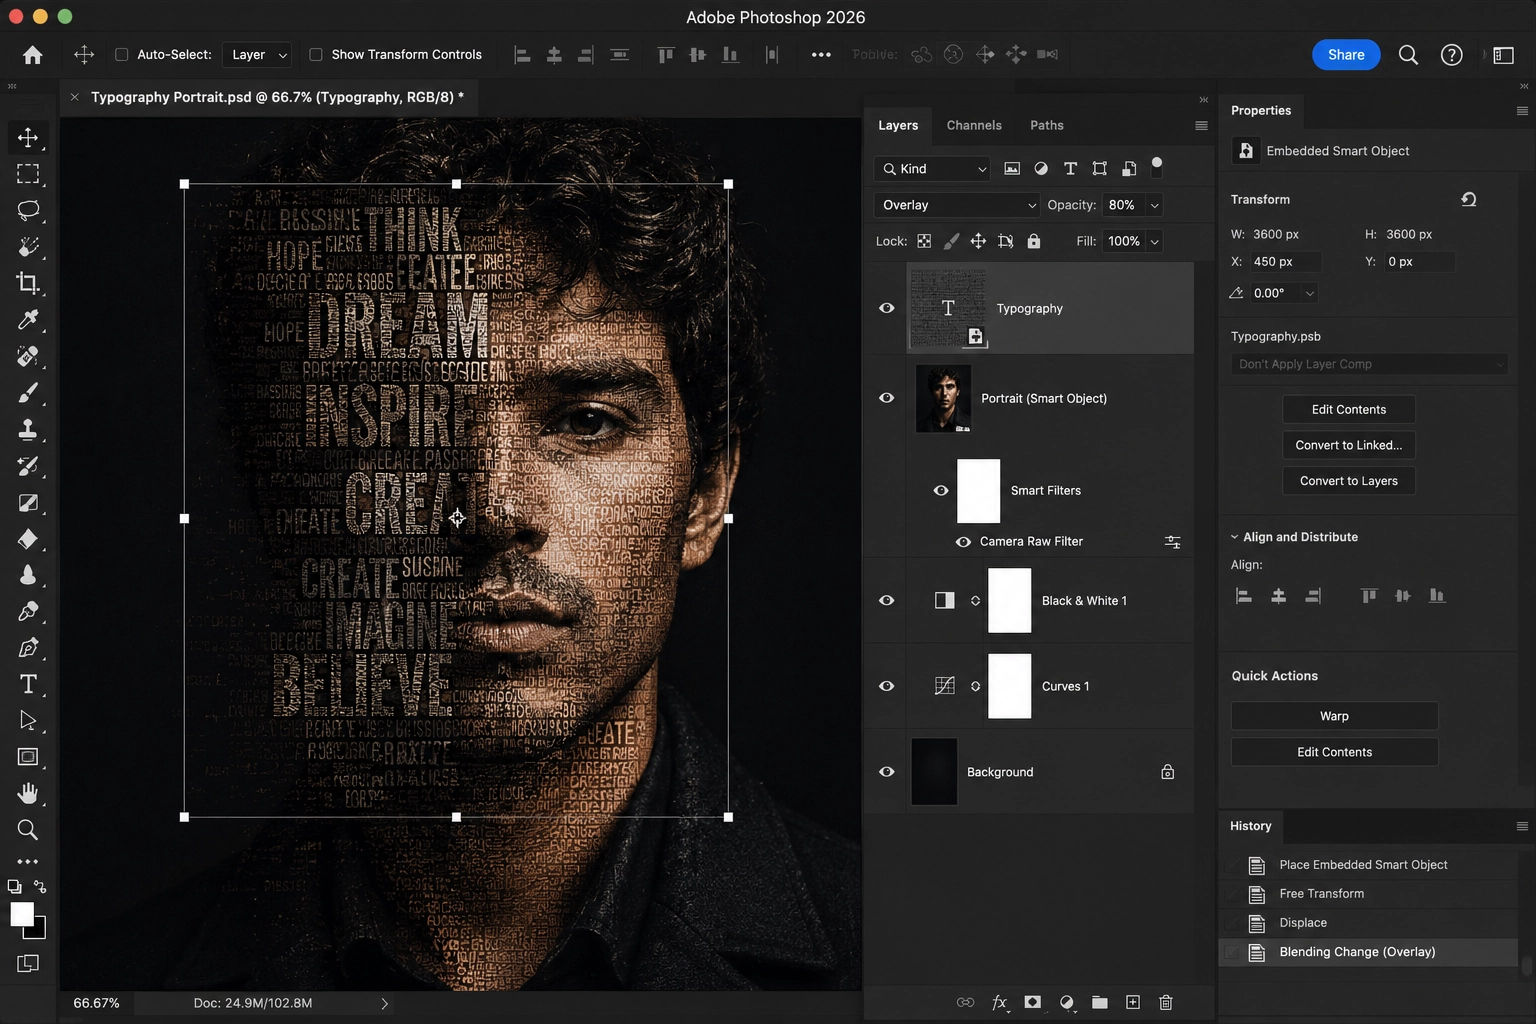
Begin by opening your typography design or text composition in Adobe Photoshop 2026. Instead of copying and pasting the text directly, use File > Place Embedded to import it as a Smart Object. This keeps your typography fully editable and prevents any loss of quality while resizing or transforming it.
Position the typography over the portrait using Free Transform (Ctrl/Cmd + T). Resize and rotate it until it covers the desired facial area, whether that’s the entire face or only selected regions such as the forehead, cheeks, or jawline. Lowering the typography layer’s opacity temporarily can help align the text more accurately with the facial features.
Once the typography is positioned correctly, go to Filter > Distort > Displace and select the Portrait_Displacement_Map.psd file you created in the previous step. Photoshop will automatically distort the typography based on the brightness and shadows of the portrait, allowing the text to follow the natural contours of the face.
After applying the displacement map, make any necessary refinements using Edit > Transform > Warp to better match areas around the nose, eyes, lips, and chin. Working with a Smart Object allows you to reopen and edit the typography at any time without rebuilding the entire effect.
Taking a few extra minutes to fine-tune the typography placement will produce a far more realistic and professional typography portrait.
7. Blending and Refining the Typography
Once the typography has been applied using the displacement map, the next step is refining the effect so it looks naturally integrated with the portrait. Professional typography portraits are created through careful blending, masking, and subtle adjustments rather than relying solely on the displacement filter.
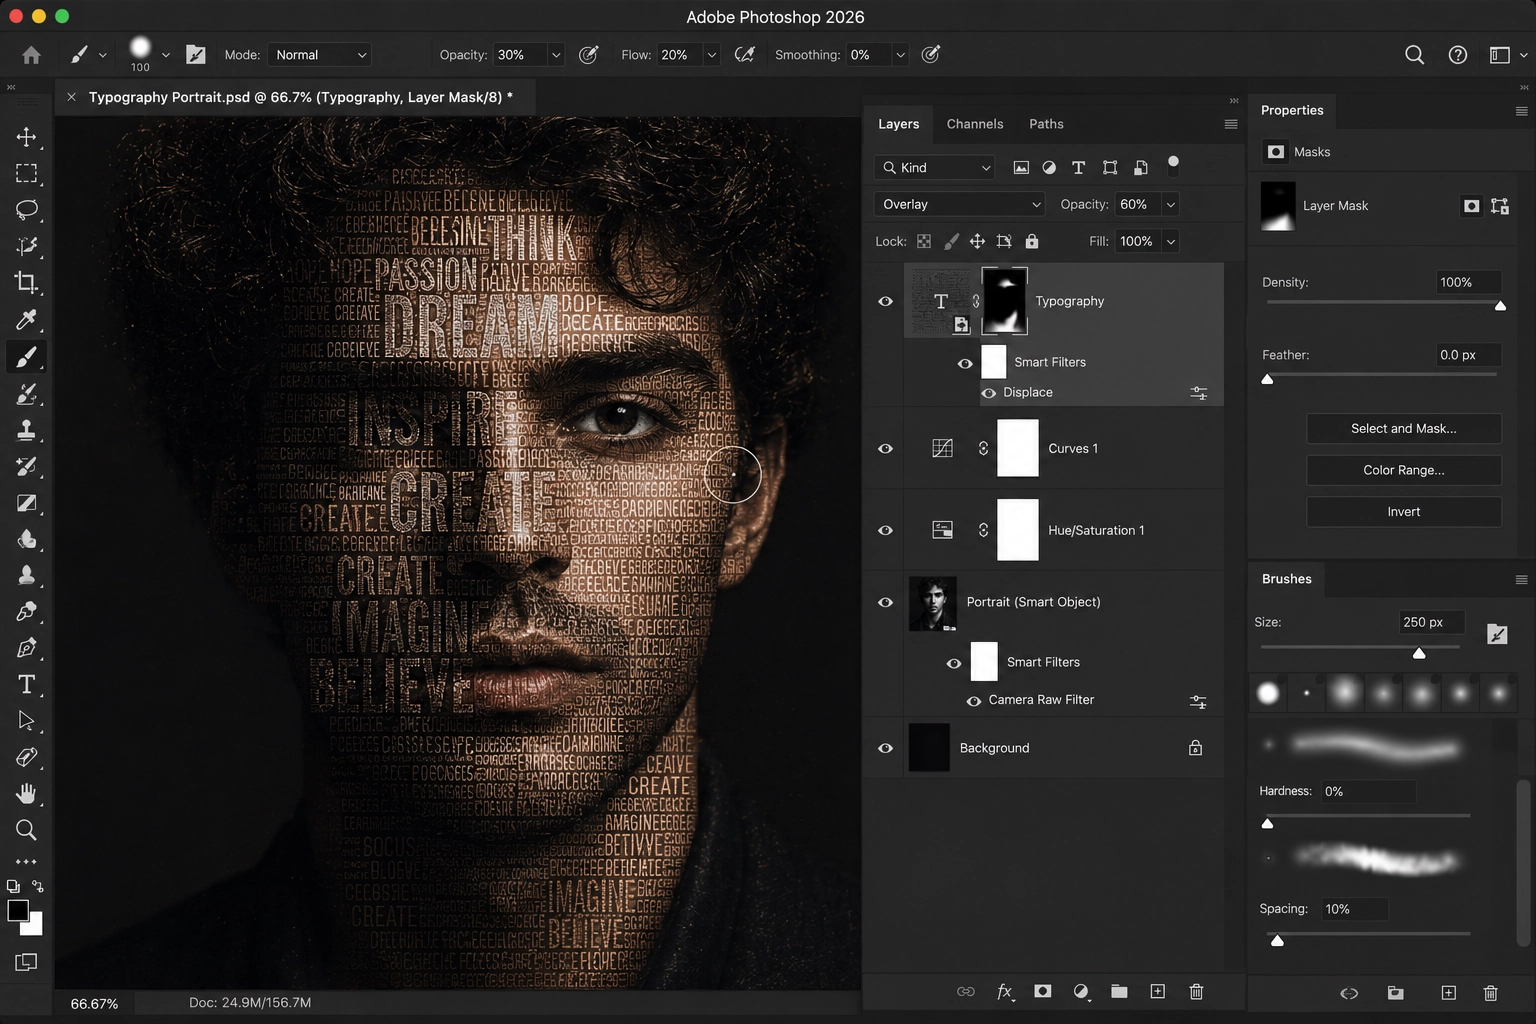
Start by experimenting with the typography layer’s Blend Mode. Options such as Overlay, Soft Light, Multiply, and Luminosity often produce the most realistic results because they allow the portrait’s natural highlights and shadows to show through the text. Reduce the layer Opacity slightly until the typography blends smoothly without overpowering the facial features.
Next, add a Layer Mask to the typography layer. Using a soft brush with low opacity, gently hide portions of the text around important facial details such as the eyes, eyelashes, lips, nostrils, eyebrows, and hairline. Preserving these features helps maintain the subject’s expression while making the typography appear wrapped around the face.
To create a cohesive look, use Curves, Levels, or Hue/Saturation Adjustment Layers clipped to the typography layer. These adjustments allow you to match the contrast, brightness, and color tones between the portrait and the typography without permanently changing either layer.
If necessary, apply a very subtle Gaussian Blur or reduce the typography’s sharpness slightly so it matches the focus of the original portrait. Small refinements like these often make the difference between a beginner’s design and a professional-quality typography portrait.
Take time to zoom in and inspect every area of the portrait. Clean masking, balanced contrast, and realistic blending will give your final artwork depth, dimension, and a polished appearance.
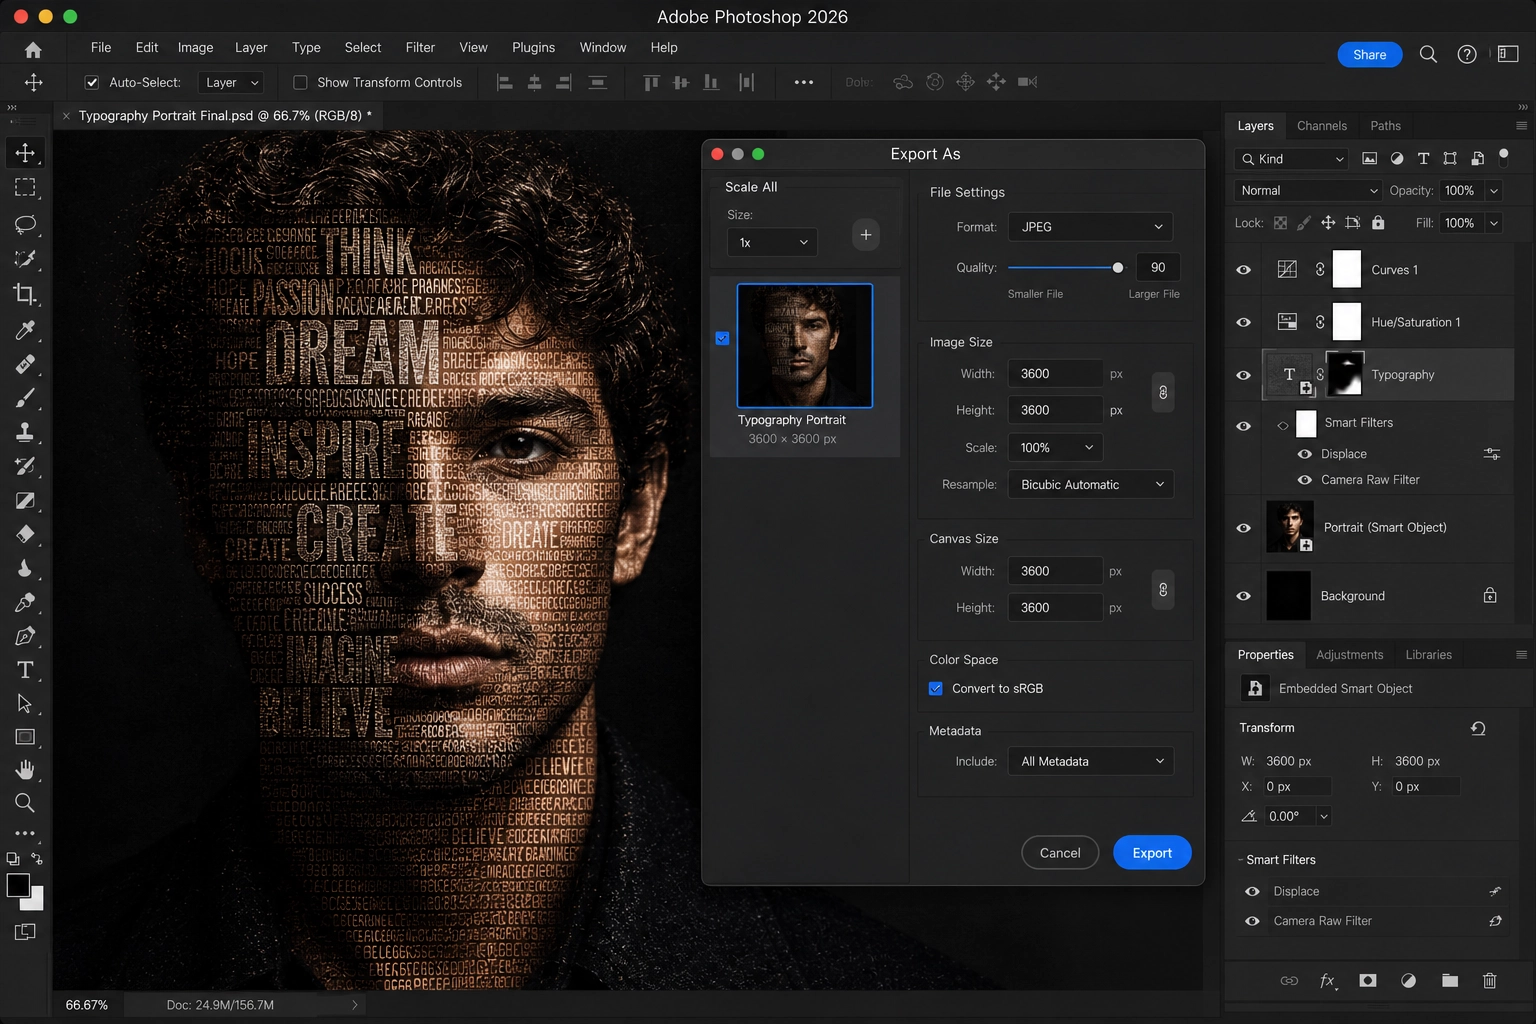
8. Final Touches and Exporting Your Typography Portrait
Your typography portrait is almost complete. The final stage is all about polishing the artwork and exporting it in the right format for print, social media, or your creative portfolio.
Begin by reviewing the overall composition at 100% zoom to check for any masking errors, misplaced typography, or unwanted artifacts around the facial features. Small imperfections that are difficult to notice while zoomed out often become visible during this final inspection.
If necessary, make subtle adjustments using Camera Raw Filter, Curves, or Color Balance to improve contrast, skin tones, and overall lighting. A light amount of Smart Sharpen can also help enhance facial details without making the typography appear overly sharp.
Before exporting, save a fully editable PSD version that preserves all Smart Objects, Layer Masks, and Adjustment Layers. This allows you to revisit the project later without losing flexibility.
For sharing your work online, export a high-quality JPEG or PNG using File → Export → Export As. Choose the appropriate image dimensions depending on your intended platform, and enable the sRGB color profile to ensure consistent colors across different devices and web browsers.
By combining clean typography placement, realistic blending, and careful finishing touches, you’ll create a typography portrait that looks polished, professional, and ready for publication.

12. Conclusion
Creating a typography portrait in Adobe Photoshop 2026 is an excellent way to combine photography, typography, and digital art into a single eye-catching design. With modern tools like Smart Objects, Layer Masks, Select Subject, Adjustment Layers, and Displacement Maps, you can build realistic typography effects while maintaining a completely non-destructive workflow.
The key to achieving professional results lies in careful preparation, accurate subject selection, realistic typography placement, and subtle blending. By following the techniques covered in this tutorial, you’ll be able to create typography portraits that are suitable for social media graphics, album covers, movie posters, personal artwork, branding projects, and creative portfolios.
Like any advanced Photoshop technique, practice is essential. Experiment with different fonts, layouts, blend modes, and portrait styles to develop your own unique creative approach. As you gain experience, you’ll discover new ways to make your typography portraits even more expressive and visually engaging.

Leave a Reply
Want to join the discussion?Feel free to contribute!